Understanding Laptop Microphone Problems
A laptop microphone can stop working correctly even when the speakers, webcam, and other audio features continue operating normally. Voice recordings may sound extremely quiet, distorted, muffled, interrupted, or filled with static. In other cases, the microphone may disappear completely from communication applications and system settings.
These symptoms can originate from blocked microphone openings, incorrect input selection, privacy restrictions, software configuration, damaged internal cables, or failure within the microphone assembly itself. Identifying the cause requires separating application problems from operating system settings and physical hardware faults.
Internal Microphones Are Usually Built Into the Display Area
Many laptops place one or more microphones near the webcam at the top of the display bezel. Some models use openings beside the keyboard, along the edge of the screen, or within another section of the upper case.
The visible holes are only sound openings. Behind them are small microphone components connected to the motherboard through a cable, webcam assembly, display harness, or separate audio board.
Microphone Arrays Use More Than One Input
Modern laptops often use a microphone array rather than one microphone. Multiple inputs can help reduce background noise, identify the direction of a voice, and improve speech clarity during calls.
If one microphone in the array becomes blocked or damaged, voice input may still work but sound uneven, distant, or unusually noisy. This can make the problem appear less serious than a complete microphone failure while still interfering with meetings and recordings.
Common Symptoms of a Failing Laptop Microphone
- The microphone records no sound.
- Voice volume remains extremely low.
- Recordings sound muffled or distant.
- Speech contains static, popping, or crackling.
- Audio cuts in and out during calls.
- The microphone appears in one program but not another.
- Background noise is louder than the speaker’s voice.
- The microphone works only when the display is positioned at a certain angle.
A Muted Microphone Can Look Like Hardware Failure
Some laptops include a dedicated microphone mute key, function-key shortcut, privacy button, or electronic shutter control. When microphone muting is active, applications may still show the input device while receiving no usable sound.
A keyboard indicator light or on-screen symbol may reveal the muted state, but these indicators are not always obvious. The physical mute control should be checked before the laptop is opened for hardware inspection.
The Wrong Input Device May Be Selected
A laptop may have several available audio inputs. The internal microphone can appear alongside a headset microphone, USB audio device, docking station, monitor, webcam, or wireless headset.
If an application selects the wrong input automatically, the internal microphone may appear defective even though the computer is listening to another device.
| Observed Problem | Possible Cause |
|---|---|
| No voice detected in one application | The wrong microphone may be selected within that program. |
| No microphone works in any application | System settings, privacy controls, drivers, or hardware may be involved. |
| Voice is extremely quiet | Input level may be low, or the microphone opening may be blocked. |
| Audio cuts out when the screen moves | An internal cable or display-area connection may be damaged. |
| Static appears during movement | A loose cable, damaged microphone, or electrical interference may be present. |
Application Permissions Can Block Voice Input
Operating systems allow microphone access to be controlled for privacy. A conferencing program, browser, recording application, or communication platform may be denied access even while other programs continue using the microphone normally.
This creates a common situation in which the microphone works during a system test but fails inside the program where it is actually needed.
Browser-Based Calls Have Separate Permissions
Web browsers often maintain microphone permissions for each website. A user may accidentally block access for a meeting platform, customer service portal, or online recording tool.
The browser may also remember an earlier decision and continue blocking the microphone during future visits until the site permission is changed.
Input Levels Affect Voice Clarity
Microphone input levels determine how strongly the computer amplifies incoming sound. A level set too low can make speech difficult to hear, while excessive amplification may introduce distortion and background noise.
Some audio systems also provide microphone boost, automatic gain control, noise suppression, and echo cancellation. These features can improve voice quality when configured correctly, but they may produce unnatural or fluctuating audio when several enhancements conflict.
Blocked Openings Can Muffle the Microphone
Dust, adhesive residue, skin oils, fabric fibers, and debris can obstruct the tiny openings that allow sound to reach the microphone. A screen protector, webcam cover, decorative sticker, or replacement bezel may also cover the openings unintentionally.
Because the openings are small, even partial obstruction can make voice input sound distant or uneven.
Cleaning Requires Careful Handling
Sharp objects should not be pushed into microphone holes. The microphone component may sit close behind the opening, and excessive force can damage its protective material or internal structure.
Cleaning should focus on removing surface debris gently without forcing contamination deeper into the laptop.
Cases and Accessories Can Interfere With Sound
A fitted shell, privacy cover, display frame, or adhesive accessory can alter the path between the speaker’s voice and the microphone. Accessories installed near the webcam area should be inspected whenever voice quality changes after they are added.
The microphone may continue recording, but sound can become muffled or quieter because the openings are partially covered.
External Microphones Can Change the Default Input
Connecting a headset, docking station, USB webcam, or Bluetooth device may cause the operating system to change the default microphone. When the accessory is removed, the computer may not return automatically to the internal input.
This can leave communication software assigned to a microphone that is no longer connected.
Headset Jacks Can Cause Input Confusion
Many laptops use a combined headset jack that supports both headphones and a microphone through one connector. A damaged plug, incorrect adapter, or partially inserted headset can cause the laptop to detect an external microphone incorrectly.
The internal microphone may then become unavailable until the headset is removed, the jack is cleaned, or the detection circuit returns to its normal state.
A laptop microphone that appears completely inactive may still be functional if the computer is muted, listening to another input, or blocking access through privacy settings.
Software and Hardware Symptoms Can Overlap
A damaged microphone cable can produce the same silence as a disabled privacy setting. Incorrect audio enhancements can create distortion similar to a failing microphone component. For this reason, diagnosis should begin with controlled recording tests before any parts are replaced.
Testing the microphone in more than one application helps determine whether the failure belongs to a specific program or affects the entire laptop.
Movement-Related Symptoms Suggest a Physical Problem
If voice input changes when the display is opened, closed, or adjusted, the microphone cable may be stretched, pinched, or partially disconnected. This is especially important on laptops where the microphone and webcam share wiring routed through the hinge area.
Static or intermittent sound during display movement should be investigated before the cable fails completely or damages another component in the assembly.
The Failure Pattern Helps Guide the Next Test
A microphone that fails only in one application should be approached differently from one that disappears from the operating system. Quiet audio suggests a different set of causes than crackling, intermittent input, or failure linked to screen movement.
Diagnosis Should Begin With a Simple Recording Test
A controlled recording provides a clearer starting point than relying only on a video call. The internal microphone should be tested with a basic recording application while speaking at a normal distance and volume.
The recording should then be played back through known-working speakers or headphones. This helps separate microphone input problems from speaker, conferencing, or internet connection issues.
Testing More Than One Application Helps Narrow the Cause
If the microphone works in a recording program but fails in a browser or meeting platform, the hardware is probably still functioning. The problem is more likely related to application permissions, input selection, or software configuration.
If every application produces the same weak, distorted, or missing sound, the investigation should move toward system settings, drivers, and internal hardware.
The Correct Input Device Must Be Confirmed
The operating system may list several microphones even when only one is currently useful. Internal microphones, headset inputs, USB webcams, docking stations, Bluetooth devices, and monitor audio interfaces can all appear as separate choices.
The selected device should be identified by name and tested directly. Disconnected or inactive inputs should not be assumed to represent the laptop microphone.
Input Meters Reveal Whether Sound Is Reaching the System
Most operating systems display a level meter that moves when the microphone receives sound. Speaking near the laptop while watching the meter can show whether the system detects any input at all.
- No meter movement may indicate muting, blocked permissions, the wrong device, a driver problem, or hardware failure.
- Very small movement may indicate low input gain or a blocked microphone opening.
- Constant high movement may suggest excessive background noise, feedback, or electrical interference.
- Irregular movement during display adjustment may indicate a cable or connection problem.
Microphone Levels Should Be Adjusted Carefully
Input volume should be high enough to capture clear speech without causing clipping or distortion. Raising the level too far can amplify fan noise, keyboard sounds, room echo, and electrical interference.
Testing should begin with moderate settings and increase gradually while reviewing short recordings.
Microphone Boost Can Improve or Degrade Sound
Some audio drivers include a microphone boost setting that adds additional gain. This can help when the signal is unusually quiet, but excessive boost may produce hiss, distortion, or an unstable volume level.
If the microphone sounds harsh or noisy, reducing boost may provide better results than lowering the main input level alone.
Audio Enhancements Should Be Tested Individually
Noise suppression, beam forming, echo cancellation, voice isolation, and automatic gain control are intended to improve speech quality. However, these features can sometimes remove parts of a voice, create pulsing volume, or make audio sound metallic.
Disabling enhancements temporarily can reveal whether the distortion is being created by software processing rather than the microphone hardware.
| Test Result | Likely Direction |
|---|---|
| Works in one program only | Application settings or permissions |
| Works after changing the selected input | Incorrect default microphone |
| Improves with enhancements disabled | Audio processing conflict |
| Changes when the display moves | Internal cable or connector problem |
| Remains distorted in every test | Driver, microphone assembly, or circuit fault |
Privacy Settings Can Block Desktop Applications
System privacy controls may allow microphone access generally while blocking individual desktop applications. The affected program may still open normally and display the microphone name, but no audio reaches it.
Both the main microphone permission and the application-specific permission should be reviewed.
Browser Permissions Should Be Checked Per Website
A browser can allow microphone access for one website while blocking another. The selected input inside the browser may also differ from the system default.
Site permissions, browser input settings, and the meeting platform’s own audio controls should all point to the same working microphone.
Driver Problems Can Remove or Distort the Input
The internal microphone depends on the laptop’s audio driver, chipset components, and sometimes additional software supplied by the manufacturer. A corrupted, incomplete, or incompatible driver can cause the microphone to disappear or behave unpredictably.
Problems may begin after an operating system update, driver replacement, system recovery, or installation of third-party audio software.
Generic Drivers May Not Support Every Feature
A basic audio driver may restore speaker output while failing to support the microphone array, noise reduction, or jack detection correctly. The laptop can appear to have functional sound even though part of the audio system remains unavailable.
Using the appropriate driver package for the laptop model can restore features that are missing under a generic driver.
Device Recognition Should Be Reviewed
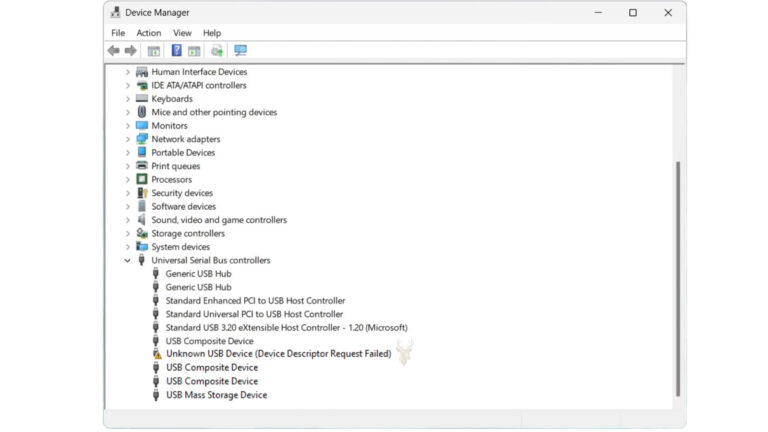
If the internal microphone is absent from the list of recording devices, the audio controller and associated components should be checked for warnings or detection errors. A missing device may indicate a driver issue, disabled hardware, disconnected cable, or failed microphone assembly.
Repeatedly reinstalling drivers without confirming whether the hardware is detected can delay the correct diagnosis.
External Microphones Provide a Useful Comparison
A known-working USB headset or external microphone can help determine whether the operating system and communication software can process voice input correctly. If the external device works while the internal microphone does not, the problem is more likely limited to the laptop’s internal audio path.
If both internal and external microphones fail, system permissions, application settings, or broader audio software problems should be investigated first.
Headset Jack Detection Can Remain Stuck
A combined audio jack may continue reporting that a headset microphone is connected after the plug has been removed. The laptop may then ignore its internal microphones or route input incorrectly.
Inspecting the jack, reconnecting a known-compatible headset, and reviewing the manufacturer’s audio control software can help identify incorrect detection.
Bluetooth Devices Can Take Over the Input
Wireless headsets and earbuds may reconnect automatically and become the default microphone even when they are located elsewhere in the room. Their low battery, weak signal, or limited call-quality mode can produce distorted voice input.
Temporarily disconnecting Bluetooth audio devices helps confirm whether they are affecting the test.
Fan Noise Can Be Mistaken for Microphone Failure
A microphone may be operating correctly but capturing unusually loud fan noise from an overheating or dust-restricted laptop. Automatic gain can make the fan more noticeable when the speaker pauses.
Comparing recordings while the laptop is idle and under load can reveal whether cooling noise is contributing to poor call quality.
Electrical Interference Can Produce Static
Static or buzzing may appear only while the charger, docking station, or external monitor is connected. A damaged power adapter, poor grounding, or noisy accessory can introduce interference into the audio system.
Testing briefly on battery power and disconnecting accessories one at a time can identify whether the noise is entering through external equipment.
Display Movement Can Expose Cable Damage
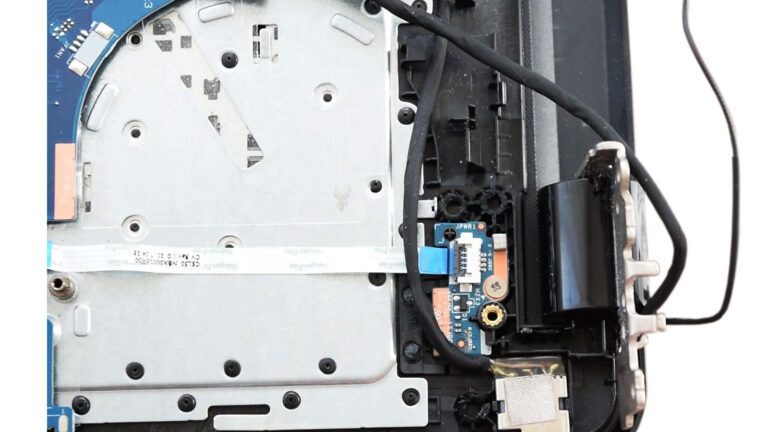
On many laptops, microphone wiring runs from the display assembly through one of the hinges to the motherboard. Repeated opening and closing can weaken the cable, especially if the hinge is tight, damaged, or misaligned.
If recordings crackle, disappear, or return while the screen angle changes, the cable routing and hinge area require inspection.
Webcam and Microphone Failures May Be Related
The webcam and microphone array often share the same cable or module. When both stop working at the same time, a disconnected display cable, damaged camera assembly, or missing combined driver becomes more likely.
If the webcam works normally while only one microphone channel fails, the fault may be limited to the microphone array or its audio path.
Previous Screen Repairs Can Affect Microphone Operation
A display replacement may require the webcam and microphone cable to be transferred, rerouted, or reconnected. If the cable is pinched beneath the bezel or not seated fully, voice input may become weak or intermittent after the repair.
Microphone openings can also be covered accidentally by adhesive, tape, or an incorrectly positioned replacement bezel.
Liquid Exposure Can Damage Small Audio Components
Liquid entering near the keyboard, display, or webcam area can corrode microphone contacts and nearby circuitry. The microphone may continue working temporarily before static, low volume, or complete failure develops.
Corrosion should be considered when symptoms begin after a spill, even if the laptop appeared normal immediately afterward.
Internal Inspection Should Follow External Testing
The laptop should be opened only after software settings, permissions, external devices, and basic recording tests have been checked. Internal inspection may include the microphone module, display harness, motherboard connector, audio board, and hinge routing.
This order reduces unnecessary disassembly and helps ensure that a simple configuration problem is not mistaken for failed hardware.
Replacement Parts Must Match the Laptop Design
Microphone assemblies may be built into the webcam module, display cable, bezel, or separate board. Parts that appear similar can use different connectors, pin arrangements, mounting locations, or firmware support.
The exact laptop model and original part configuration should be confirmed before replacement.
A Complete Diagnosis Identifies Where the Signal Is Lost
Reliable troubleshooting follows the voice signal from the microphone opening through the internal assembly, cable, audio controller, operating system, and application. Each stage should be tested rather than assuming that the visible microphone component is responsible.
Repair Decisions Depend on the Source of the Failure
A laptop microphone problem should be repaired according to the point where the audio signal is being interrupted. Software settings, damaged cabling, blocked openings, failed microphone modules, and motherboard faults require different solutions.
Replacing parts before identifying the source can leave the original problem unchanged and introduce unnecessary cost.
Configuration Problems May Not Require Hardware Repair
If testing confirms that the microphone works in basic recordings, the repair may involve correcting application permissions, selecting the proper input, adjusting levels, or reinstalling the appropriate audio driver.
After changes are made, the microphone should be retested in the applications where the original failure occurred.
Blocked Openings Must Be Cleared Without Damaging the Microphone
Surface debris near the microphone openings can often be removed without replacing hardware. Any screen protector, adhesive cover, or replacement bezel blocking the sound path should be corrected.
Liquids, metal tools, and sharp objects should not be inserted into the openings because the microphone may sit directly behind them.
Damaged Display-Area Wiring May Require Disassembly
When microphone operation changes with screen movement, the display bezel, hinge area, and internal cable routing may need inspection. A pinched or partially torn cable can sometimes be repositioned, but damaged conductors usually require replacement.
The hinge should also be checked because excessive resistance or structural damage can place continuing stress on replacement wiring.
The Microphone May Be Part of a Larger Assembly
Some laptops combine the microphones, webcam, indicator light, and wiring into one assembly. If the microphone component is not available separately, the complete camera or display cable assembly may need replacement.
Part numbers should be matched carefully because visually similar assemblies may use different connectors or microphone arrangements.
Motherboard Audio Faults Require Deeper Testing
If the microphone assembly and cable test correctly but no internal input reaches the operating system, the fault may exist within the audio controller, connector, power circuit, or motherboard signal path.
Board-level diagnosis may be necessary when liquid corrosion, damaged connectors, or failed components are found near the audio circuitry.
| Confirmed Cause | Possible Repair |
|---|---|
| Incorrect input or privacy setting | Correct software configuration and retest |
| Blocked microphone opening | Remove obstruction and clean the surface carefully |
| Damaged display-area cable | Repair routing or replace the cable assembly |
| Failed microphone or webcam module | Replace the matching internal assembly |
| Corroded connector or audio circuit | Clean, repair, or replace the affected hardware |
Post-Repair Testing Should Use Several Applications
A successful repair should be verified with a basic voice recording, a browser-based microphone test, and at least one communication application. This confirms that the microphone works at both the system and application levels.
The selected input should remain correct after restarting the laptop and reconnecting common accessories.
Voice Quality Should Be Checked, Not Just Device Detection
A microphone can appear in system settings while still producing weak or distorted sound. Final testing should confirm natural voice volume, consistent clarity, and acceptable background-noise levels.
- Speech should be clear at a normal sitting distance.
- The recording should not contain constant crackling or buzzing.
- Volume should remain steady during continuous speech.
- The microphone should not cut out when the display moves normally.
- Both webcam and microphone functions should operate if they share an assembly.
Charging and Accessories Should Be Included in Testing
The microphone should be tested while the charger, dock, monitor, headset, and other commonly used accessories are connected. This can reveal electrical interference or automatic input changes that do not appear during an isolated test.
Accessories should be connected one at a time if noise or distortion returns.
Screen Movement Should Not Affect the Recording
For laptops with microphone wiring routed through the display, the screen should be adjusted gently through its normal range while recording. Audio should remain stable without popping, silence, or sudden changes in level.
Any movement-related symptom after repair suggests that the cable, connector, or hinge routing still requires attention.
Preventive Care Can Reduce Future Microphone Problems
Microphone assemblies are small and usually protected inside the laptop, but the openings and display wiring remain vulnerable to debris, liquid, pressure, and improper repairs.
- Keep stickers and webcam covers away from microphone openings.
- Avoid spraying cleaners directly onto the display or keyboard.
- Open and close the screen from the center rather than one corner.
- Do not force a stiff or damaged hinge.
- Use compatible headset adapters and insert plugs fully.
- Check the selected input after connecting docks or wireless audio devices.
Display Repairs Should Include an Audio Check
Because microphones are often located near the webcam and display bezel, screen replacement work can affect their wiring or sound openings. A microphone test should be included after replacing a display panel, bezel, webcam, hinge, or display cable.
This helps identify a loose connection or blocked opening before the laptop is returned to normal use.
Warning Signs That Need Professional Inspection
- The microphone cuts out whenever the display moves.
- The webcam and microphone fail at the same time.
- Static appears after liquid exposure.
- The microphone disappears repeatedly from system settings.
- Voice input remains distorted after drivers and settings are corrected.
- The laptop has hinge damage near the microphone cable path.
Continuing to move a damaged display assembly can worsen a partially torn cable or loosen the motherboard connector further.
A reliable microphone repair restores more than device detection; it should also provide clear, stable voice input under the same conditions in which the laptop is normally used.
Frequently Asked Questions About Laptop Microphones
Why can people hear me in one program but not another?
The affected program may be using a different input device or may not have permission to access the microphone.
Why does my voice sound muffled?
The microphone opening may be blocked, the input level may be too low, or audio processing may be reducing part of the voice signal.
Can a screen replacement cause microphone problems?
Yes. The microphone or webcam cable may be left disconnected, pinched beneath the bezel, or covered by adhesive during the repair.
Why does the microphone crackle when I move the screen?
This often indicates damaged wiring, a loose connector, or a cable being stressed near the hinge.
Can a charger cause microphone buzzing?
Yes. A damaged adapter, grounding problem, or connected accessory can introduce electrical interference into the audio system.
Does a missing internal microphone always mean failed hardware?
No. A missing microphone can also result from driver problems, disabled devices, privacy controls, or incorrect audio configuration.
Can I use an external microphone instead of repairing the internal one?
An external microphone can provide a temporary or permanent alternative, but internal cable damage or liquid corrosion should still be investigated if it may affect other components.
Clear Voice Input Depends on the Entire Audio Path
Laptop microphone problems can begin with a simple setting or develop from physical damage inside the display assembly. The microphone opening, internal module, cable, audio controller, driver, privacy controls, and communication application all influence the final recording.
Systematic testing helps determine whether sound is being blocked, routed incorrectly, distorted by software, or interrupted by failed hardware. Once the correct cause is identified, the repair can restore dependable voice input without replacing unrelated components.