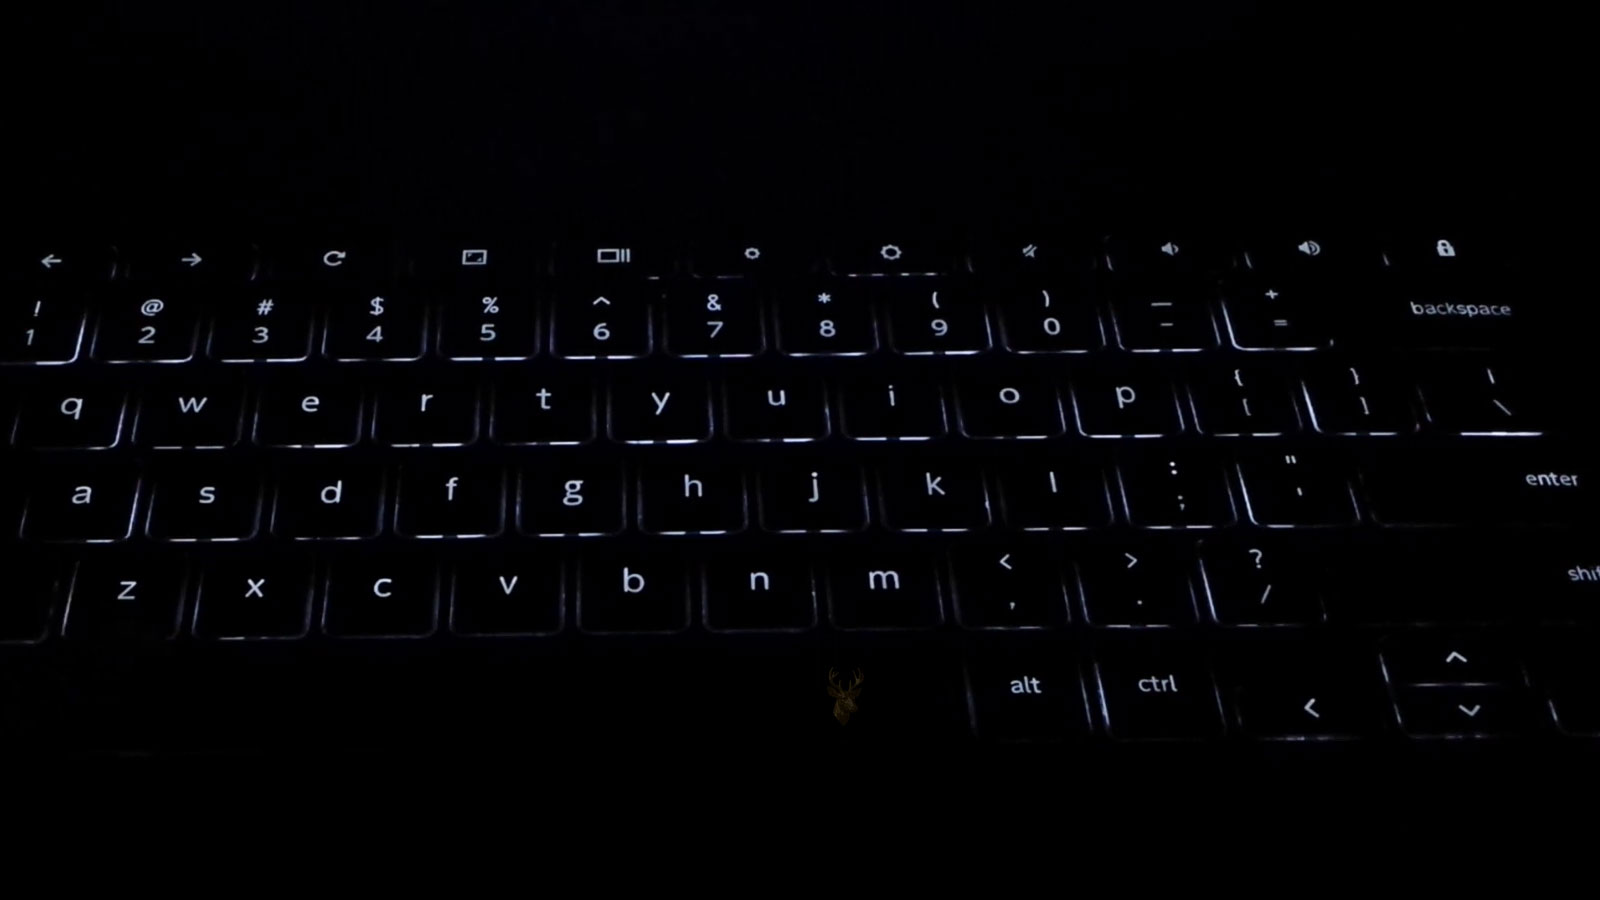
Keyboard Backlighting Uses a Separate Lighting System Beneath the Keys
A laptop keyboard can continue typing normally even when its backlight stops working. The key switches and the lighting system perform different functions, so a failure affecting illumination does not always interfere with keyboard input.
Backlit keyboards commonly use small light-emitting diodes, a thin light guide, reflective layers, translucent key markings, and a separate electrical connection that supplies or controls the lighting. A problem with any part of this system can leave the keyboard dark, dim, uneven, or unstable.
The Keyboard and Backlight May Use Separate Connections
Many laptop keyboards have one ribbon cable for key input and another smaller cable for the backlight. The main keyboard cable sends signals when keys are pressed, while the backlight connection carries power and control signals for illumination.
This arrangement explains why every key may work correctly even when the keyboard produces no light. A technician must check both connections instead of assuming that a working keyboard confirms the entire assembly is functioning.
Some Keyboards Combine Both Functions Into One Cable
Not every laptop uses separate connectors. Certain models combine keyboard input and backlight circuits within a single ribbon cable or integrated assembly. Damage to only a few conductors inside that cable may affect lighting while leaving most or all typing functions intact.
The exact design depends on the laptop model, keyboard manufacturer, and palm-rest construction.
A Light Guide Spreads Illumination Across the Keyboard
The backlight does not usually place an individual light directly beneath every key. Instead, light from several LEDs enters a thin guide layer that distributes illumination across the keyboard surface.
- A reflective layer directs light upward.
- A light guide spreads illumination across a wider area.
- Diffusion material reduces visible bright spots.
- Translucent key legends allow light to pass through.
- Dark surrounding material limits light leakage between keys.
If these layers are damaged, misaligned, contaminated, or installed incorrectly, the keyboard may light unevenly even when the electrical circuit is working.
Keyboard Backlight Designs Vary Between Laptop Models
Some laptops use white illumination with several brightness levels. Others use a single fixed level, colored LEDs, multi-zone lighting, or individually controlled RGB keys. The complexity of the lighting system affects the number of possible failure points.
| Backlight Design | Typical Characteristics | Possible Failure Behavior |
|---|---|---|
| Single-color keyboard | One color with one or more brightness levels | The entire keyboard may become dark or remain at one brightness. |
| Multi-zone lighting | Several keyboard sections controlled separately | One zone may remain dark while others work. |
| Per-key RGB lighting | Each key or small group can display different colors | Individual keys may show the wrong color or fail to illuminate. |
| Fixed backlight | Lighting turns on without adjustable levels | Failure is usually limited to fully on, fully off, or flickering. |
| Integrated palm-rest keyboard | Keyboard is permanently attached to the upper case | Repair may require replacing the complete palm-rest assembly. |
Brightness Controls May Make a Working Backlight Appear Dead
Many laptops allow the keyboard backlight to be reduced through several brightness levels until it turns off completely. A user may accidentally disable the lighting through a function-key combination, firmware setting, control utility, or automatic timeout.
Before assuming that hardware has failed, the available brightness controls should be tested under the conditions required by the manufacturer.
Function-Key Commands Depend on More Than the Keyboard
Keyboard lighting controls may depend on firmware, embedded controller logic, operating system drivers, and manufacturer software. Pressing the correct key combination may produce no response when one of these supporting components is missing or malfunctioning.
On some laptops, the function key must be held while pressing the backlight symbol. On others, the function-lock state changes whether the lighting command requires the Fn key.
Manufacturer Software Can Control Illumination
Gaming laptops and certain business systems may use a dedicated application to manage keyboard color, brightness, effects, zones, and timeout behavior. If that software is removed, corrupted, or replaced with an incompatible version, the lighting may revert to a default pattern or stop responding to adjustments.
The keyboard can still type normally because ordinary key input does not necessarily depend on the same software controls.
Firmware Settings May Disable the Backlight
Some laptop firmware menus include options for keyboard illumination, brightness during startup, timeout duration, or behavior while connected to battery power. These values may change after a firmware update, CMOS reset, motherboard replacement, or restoration of factory defaults.
If the backlight works before the operating system starts but turns off afterward, the problem may be related to software or power management. If it never illuminates at any stage, hardware and firmware causes become more likely.
Automatic Timeouts Are Designed to Conserve Power
A backlit keyboard may turn off after several seconds without input and illuminate again when a key is pressed. This is normal behavior on many laptops, particularly when operating on battery power.
A very short timeout can make the lighting appear unreliable when it is actually following a configured power-saving rule.
A Loose Backlight Cable Is a Common Repair-Related Cause
Keyboard backlight failure often appears after the laptop has been opened for battery replacement, keyboard service, palm-rest removal, motherboard repair, or internal cleaning. A small backlight ribbon may not be fully inserted when the computer is reassembled.
Because the connector can be narrow and positioned near the larger keyboard cable, it may be overlooked even when the primary keyboard connection is installed correctly.
Ribbon Cables Must Be Inserted Evenly
A ribbon cable inserted at an angle may make contact on some conductors while leaving others disconnected. The result can be no illumination, intermittent lighting, flickering, or operation only when pressure is applied near the connector.
The cable should sit straight and reach the correct insertion depth before the connector latch is closed.
Connector Latches Can Break During Disassembly
Many laptop ribbon connectors use a small locking bar or hinged latch. If this piece breaks, the cable may no longer remain pressed against the electrical contacts.
A broken latch can create intermittent behavior even when the cable appears to be in place. Tape or external pressure may temporarily hold the cable, but it does not restore the connector’s original clamping force or reliability.
Cable Damage May Be Too Small to See Easily
Backlight ribbon cables are thin and can be damaged by sharp folds, pulling, tool contact, trapped screws, or repeated bending. A conductor may crack internally without producing an obvious tear across the full width of the cable.
- Creases near the connector contacts
- Torn edges or missing contact material
- Scratches across conductive traces
- Discoloration from heat or electrical damage
- Compression marks from screws or case edges
- Residue that interferes with the connector contacts
Incorrect Keyboard Replacement Parts May Lack Backlighting
Two replacement keyboards may fit the same laptop opening while supporting different features. A lower-cost version may not include a backlight layer, even though the key layout and mounting points appear identical.
A non-backlit keyboard may also omit the additional ribbon cable or backlight contact required by the motherboard.
Part Numbers Matter More Than External Appearance
Laptop manufacturers may offer several keyboard variations for the same product family. Differences can include language layout, key color, regional symbols, backlight support, connector position, cable length, and palm-rest integration.
The replacement part should be matched using the laptop model, original keyboard part number, connector arrangement, and backlight capability rather than appearance alone.
A Backlit Keyboard May Be Installed Without the Required Motherboard Support
Some laptop models are sold in both backlit and non-backlit configurations. The motherboard used in a lower-cost version may not include the connector, power circuit, firmware support, or control signal needed to operate a backlit replacement keyboard.
Installing a backlit keyboard does not automatically add the missing electrical support.
Uneven Illumination Often Points to the Keyboard Assembly
If one side of the keyboard is bright while another is dim, the problem may involve a failed LED, damaged light guide, contamination, pressure, or incorrect assembly. A motherboard control problem is more likely to affect the entire lighting system rather than one isolated area.
Localized dark areas therefore provide a different diagnostic direction than a keyboard with no illumination anywhere.
| Lighting Symptom | Possible Direction |
|---|---|
| No keys illuminate | Brightness setting, disconnected cable, missing power, failed control circuit, or non-backlit keyboard |
| One section remains dark | Failed LED group, damaged light guide, zone failure, or internal keyboard damage |
| Lighting flickers when the case is moved | Loose connector, damaged ribbon cable, cracked solder joint, or case pressure |
| Keys are bright near one edge only | Light guide misalignment or partial LED failure |
| Backlight works only during startup | Operating system software, driver, utility, or power-management setting |
| Backlight remains on but will not adjust | Function-key control, embedded controller, firmware, or software problem |
Bright Spots Can Indicate Pressure Against the Light Guide
A localized bright area may appear when the keyboard layers are compressed unevenly. Incorrect screws, warped palm-rest material, debris, adhesive buildup, or a swollen component beneath the keyboard can change how light travels through the guide.
This effect may become more visible in a dark room or at the highest brightness setting.
Dim Areas May Follow Liquid Exposure
Liquid can spread between the keyboard layers and leave residue that blocks or scatters light. Even after the keys begin working again, stains or corrosion may continue affecting illumination.
Sugary drinks and other contaminated liquids can create permanent optical damage inside the layered keyboard assembly.
Liquid Damage Can Also Affect the Backlight Circuit
Moisture may reach the keyboard connector, motherboard socket, protective components, or power-control circuitry. In this case, the failure is electrical rather than limited to the light guide.
A laptop that has experienced liquid exposure should be examined before repeated power-on attempts because corrosion can continue developing after the surface appears dry.
A Working Keyboard Does Not Rule Out Liquid Damage
The conductive paths used for key input can survive while the backlight circuit fails. Liquid may damage only the smaller backlight cable, connector pins, LED supply, or control components.
Typing normally confirms that key input is present, but it does not confirm that the keyboard’s lighting layers and power circuit remain healthy.
Flickering Can Be Triggered by Movement or Pressure
If illumination changes when the palm rest is pressed, the laptop is lifted, or the display is opened, the problem may involve a loose ribbon cable, damaged connector, flexing motherboard, or case deformation.
Continued pressure testing can worsen a weak connector or cracked circuit path, so the movement that triggers the symptom should be noted without repeatedly forcing the chassis.
Heat Can Change an Intermittent Backlight Problem
Electrical contacts and solder joints expand slightly as the laptop warms. A weak connection may work when cold and begin flickering after the computer has been running, or it may behave in the opposite pattern.
Temperature-sensitive behavior can help identify an unstable connection but does not reveal the exact failed component by itself.
The Motherboard Must Supply the Correct Backlight Power
The keyboard backlight requires an appropriate voltage from the motherboard. This supply may pass through a fuse, switching transistor, current-limiting component, or dedicated control circuit before reaching the keyboard connector.
If the motherboard does not provide the expected voltage, replacing the keyboard alone may not restore illumination.
A Blown Fuse Can Leave Only the Lighting Inoperative
Some motherboards protect the keyboard backlight supply with a small surface-mounted fuse. A shorted keyboard, liquid damage, incorrect connection, or tool contact during repair can open that fuse.
The laptop may continue operating normally while the protected backlight circuit remains without power.
Short Circuits Should Be Addressed Before Replacing Protective Components
If a backlight fuse has failed, the cause should be investigated before the fuse is replaced. Installing another fuse while a short remains can cause the replacement to fail immediately or damage a control component.
The keyboard, cable, connector, and motherboard circuit should be checked for evidence of liquid, pin damage, or incorrect installation.
Incorrect Cable Alignment Can Cause Electrical Damage
A backlight ribbon inserted upside down, shifted sideways, or connected while power remains present can place voltage on the wrong contacts. Depending on the circuit design, this can damage the keyboard, motherboard fuse, connector, or switching component.
The internal battery should normally be disconnected before keyboard cables are removed or installed.
Backlight Failure After Repair Should Be Investigated Promptly
If the lighting worked before a laptop was opened and failed immediately afterward, the recent repair provides an important diagnostic clue. The backlight cable may have been left disconnected, pinched, damaged, or inserted incorrectly.
Continuing to use the laptop may not harm a simple disconnected cable, but a pinched or shorted connection can create a greater electrical risk.
Diagnosis Should Begin With the Exact Lighting Behavior
Keyboard backlight problems are easier to diagnose when the symptom is described precisely. A keyboard that never illuminates requires a different approach from one that flickers, loses only one zone, remains dim, or works only before the operating system loads.
The timing, location, and conditions of the failure can help separate keyboard assembly damage from cable, software, firmware, or motherboard problems.
Testing Should Include Every Available Brightness Level
Some laptops cycle through off, low, medium, and high brightness settings. Pressing the control once may simply move the keyboard from one dim level to another, especially in a bright room where the difference is difficult to see.
- Move the laptop into a darker environment.
- Press the keyboard illumination control several times.
- Allow a few seconds between commands.
- Test with and without the Fn key if the model supports function lock.
- Observe whether any keys, edges, or zones respond.
A faint response confirms that at least part of the lighting circuit is active, even if full brightness is no longer available.
The Backlight Should Be Observed During Startup
Some laptops briefly illuminate the keyboard when the power button is pressed, before Windows or another operating system loads. This moment provides a useful comparison because manufacturer utilities and most operating system settings are not yet controlling the lighting.
If the backlight works during startup but turns off after sign-in, the hardware may be functional and the problem may involve software, power management, or a user profile setting.
Firmware Setup Can Provide a Software-Independent Test
Entering the BIOS or UEFI setup allows the keyboard to be tested outside the normal operating system environment. Depending on the laptop, the brightness keys may still function there, or the firmware menu may contain a keyboard illumination option.
A backlight that remains completely inactive in firmware is less likely to be affected only by a Windows driver or manufacturer application.
External Keyboards Do Not Fully Test the Internal Backlight Circuit
An external USB or Bluetooth keyboard can confirm that the operating system accepts keyboard input, but it does not verify the internal keyboard cable, lighting layer, connector, or motherboard backlight supply.
External testing is useful for maintaining access to the computer, but the internal backlight still requires its own diagnosis.
Power Cycling Can Reset Embedded Controller Behavior
The embedded controller manages many low-level laptop functions, including keyboard commands, battery behavior, fans, charging, and sometimes illumination. A temporary controller state may prevent the backlight from responding even though the hardware is not permanently damaged.
A complete power reset may involve shutting down the laptop, disconnecting the charger, disconnecting the internal battery when service access permits, and holding the power button briefly before reconnecting power. The correct procedure varies by model.
Sleep and Wake Problems Can Affect Keyboard Lighting
A backlight may work after a full startup but fail after the laptop resumes from sleep. In this situation, the lighting hardware may be functional while the embedded controller, driver, or manufacturer utility fails to restore the previous state.
Comparing behavior after restart, shutdown, sleep, and hibernation can reveal whether the failure is tied to a particular power transition.
Battery and AC Power Modes May Use Different Rules
Some laptops reduce keyboard brightness or shorten the illumination timeout while running on battery power. Others disable certain lighting effects unless the charger is connected.
| Test Condition | What the Result May Suggest |
|---|---|
| Works only with the charger connected | Battery power policy, manufacturer utility, firmware setting, or low-battery restriction |
| Works only on battery power | AC profile conflict, charging-related software behavior, or unusual control issue |
| Fails after sleep but returns after restart | Embedded controller, driver, or resume-state problem |
| Works in firmware but not in Windows | Software, hotkey service, user profile, or power-management issue |
| Fails in every environment | Keyboard, cable, connector, power supply, fuse, or motherboard circuit |
Hotkey Services May Be Required for Brightness Commands
Many laptop manufacturers install a background service that translates function-key presses into actions such as changing keyboard brightness. If the service is missing, disabled, or incompatible with the operating system, the backlight control key may appear unresponsive.
The lighting may remain fixed at its last state or default setting because the command is not reaching the embedded controller.
Generic Drivers May Restore Typing but Not Special Features
Windows can often operate the basic keyboard through a standard input driver. Special functions such as illumination, color effects, zone control, and timeout settings may still depend on manufacturer-specific software.
This distinction explains why a keyboard can type correctly after an operating system installation while the backlight controls remain unavailable.
Software Reinstallation Should Match the Exact Laptop Model
Hotkey packages and lighting utilities are not always interchangeable between related laptop models. An application may install successfully yet fail to recognize the keyboard controller or available lighting zones.
- Confirm the full laptop model and hardware revision.
- Use the operating system version supported by the manufacturer.
- Install chipset and system interface drivers when required.
- Restore the correct hotkey or keyboard control package.
- Restart the laptop before testing the lighting again.
Operating System Updates Can Change Lighting Behavior
An operating system update may replace a driver, disable an older service, change startup behavior, or conflict with a manufacturer utility. The backlight may stop responding immediately after the update even though no internal hardware was disturbed.
The update history, driver version, and timing of the first failure should be reviewed before the laptop is disassembled.
User Profiles Can Store Different Lighting Preferences
Some lighting applications save brightness, color, or effects separately for each Windows user. The keyboard may behave normally in one account and remain dark in another because the software loads different profile settings.
Testing with another user profile can help determine whether the issue is limited to saved preferences rather than the keyboard hardware.
Internal Inspection Should Begin With Battery Disconnection
When software and firmware checks do not explain the failure, the laptop may need to be opened. The charger should be removed and the internal battery disconnected before keyboard or backlight cables are handled.
Many modern laptops continue supplying standby voltage to internal connectors even while the computer appears to be shut down.
The Backlight Connector Can Be Easy to Miss
A small backlight connector may be located beside the larger keyboard socket, beneath another cable, or near the edge of the motherboard. Its latch and contact orientation may differ from the primary keyboard connection.
Service diagrams, connector labels, or photographs taken before disassembly can help prevent the cable from being overlooked or installed incorrectly.
Connector Contacts Should Be Examined Under Magnification
Small amounts of corrosion, bent contacts, damaged plastic, and lifted solder joints may not be visible during a quick inspection. Magnification can reveal whether the ribbon reaches every contact evenly and whether the connector remains securely attached to the motherboard.
A connector that moves when light pressure is applied may have cracked solder joints or damaged mounting points.
A Damaged Cable End May No Longer Make Reliable Contact
The exposed conductive fingers at the end of a ribbon cable can wear, peel, oxidize, or become scratched. Repeated insertion and removal may shorten or deform the contact area enough to create intermittent lighting.
Trimming, scraping, or modifying the cable end without understanding its construction can permanently damage the conductors.
Continuity Testing Can Identify Broken Conductors
When the ribbon cable has accessible endpoints, continuity testing may reveal an open conductor between the keyboard and motherboard connection. This is especially useful when the cable appears intact but the lighting changes as the palm rest moves.
The cable must be tested carefully because probe pressure can damage thin contacts or create misleading readings.
Voltage Testing Separates Supply Problems From Keyboard Failure
Measuring the backlight supply at the motherboard connector can help determine whether the board is providing power when illumination is requested. A correct voltage with no light points toward the keyboard assembly or cable, while missing voltage shifts attention toward the fuse, switching circuit, controller, or firmware command.
The expected voltage and pin assignment must be confirmed for the exact motherboard because testing the wrong contacts can create a short circuit.
Backlight Voltage May Appear Only After a Control Command
Some systems do not supply continuous power to the keyboard lighting. The voltage may appear only after startup, a key press, or a brightness command from the embedded controller.
A single measurement taken while the backlight is intentionally off may incorrectly suggest that the power circuit has failed.
Brightness Control May Use Pulse-Width Modulation
Instead of reducing the supply voltage directly, a laptop may control brightness by switching the LEDs on and off rapidly. The percentage of time the circuit remains on determines the visible intensity.
A basic meter may show an averaged reading that changes with brightness level, while an oscilloscope can reveal the actual control waveform.
A Working Supply Does Not Confirm That Every LED Is Healthy
If voltage reaches the keyboard but one section remains dark, an internal LED group or conductive path may be open. Because the backlight layers are usually sealed into the keyboard assembly, individual LED repair is often impractical.
Replacement of the keyboard or complete upper-case assembly may be more reliable than attempting to separate bonded layers.
One Failed LED Can Affect a Larger Area
LEDs may be connected in groups or strings. Depending on the circuit, one open LED can interrupt an entire section rather than producing only one dark key.
This can create a sharp boundary between an illuminated zone and a completely dark zone.
Color Errors Can Point to an RGB Channel Failure
RGB keyboards create colors by combining red, green, and blue light. If one channel fails, affected keys may still illuminate but display incorrect colors.
| Observed Color Problem | Possible Missing Channel |
|---|---|
| White appears yellow | Blue may be weak or absent. |
| White appears cyan | Red may be weak or absent. |
| White appears magenta | Green may be weak or absent. |
| One zone displays only a limited range of colors | A channel, controller output, or local LED group may have failed. |
| Colors change when the case is pressed | A cable, connector, solder joint, or internal keyboard path may be intermittent. |
Lighting Profiles Can Mimic Hardware Color Failure
A custom profile may intentionally assign different colors to zones or individual keys. Before replacing an RGB keyboard, the lighting should be reset to a simple solid white or another uniform color.
If the same keys continue showing incorrect colors under several profiles, hardware failure becomes more likely.
Uneven Lighting After Replacement May Be an Assembly Problem
A newly installed keyboard can illuminate unevenly when adhesive, shields, insulation, or support brackets are missing or incorrectly positioned. The keyboard may also sit at a different height if rivets, screws, or plastic retention points were not restored correctly.
Comparing the replacement assembly with the original part can reveal missing reflective layers, padding, or structural components.
Keyboard Rivets Can Complicate Replacement
Some laptop keyboards are secured to the palm rest with melted plastic rivets rather than removable screws. Replacing only the keyboard requires those retainers to be cut and recreated or replaced with another fastening method.
Uneven fastening can cause flexing, poor key feel, light leakage, bright spots, and reduced structural support.
Complete Palm-Rest Replacement Can Preserve Factory Alignment
When the keyboard is permanently integrated into the upper case, replacing the full palm-rest assembly may preserve the original light guide pressure, cable routing, structural support, and key alignment.
The larger assembly may cost more, but it can reduce complications associated with separating a keyboard that was not designed for individual replacement.
A Swollen Battery Can Distort the Keyboard Assembly
In laptops where the battery sits beneath the palm rest or keyboard, swelling can push upward against the structure. This pressure may create bright spots, uneven key height, a raised touchpad, case separation, or changing illumination.
A swollen battery is a safety concern and should not be compressed, punctured, or left in service.
Case Damage Can Alter Cable and Keyboard Pressure
A bent base, broken screw mount, or cracked palm rest can allow the keyboard to flex. The movement may disturb a ribbon cable, change contact pressure, or distort the backlight layers.
Replacing the keyboard alone may not provide a lasting repair when the surrounding case no longer supports it correctly.
The Repair Should Address the Cause and the Failed Part
A dark keyboard caused by a loose cable may need only careful reconnection. A failed LED layer may require keyboard replacement, while missing motherboard voltage may require board-level diagnosis.
The correct repair depends on whether the lighting command, power source, connection, or illuminated keyboard assembly has failed.
Replacing parts without separating these possibilities can leave the original problem unresolved or expose a new keyboard to the same electrical fault.
Repair Decisions Depend on the Keyboard’s Construction
A keyboard backlight problem does not always lead to the same repair. Some laptops allow the keyboard to be removed separately, while others permanently attach it to the palm rest or upper case. The repair method should match the way the laptop was originally assembled.
Trying to force an integrated keyboard out of the case can damage plastic retainers, structural supports, cables, and the surrounding palm-rest material.
A Separate Keyboard Is Usually the Simplest Replacement
On serviceable designs, the keyboard may be secured with screws, tabs, or a removable frame. Once the battery is disconnected and the cables are released, the keyboard can be replaced without changing the entire upper case.
The replacement must still match the original connector layout, language, backlight type, key arrangement, and mounting design.
Integrated Keyboards May Require More Extensive Disassembly
Many thin laptops place the keyboard beneath the motherboard, battery, speakers, and other internal parts. Reaching it may require removing most of the components from the base before the keyboard or palm-rest assembly can be replaced.
This increases the importance of proper cable routing, screw placement, static protection, and reassembly checks.
Replacement Quality Can Affect Illumination
Two keyboards sold for the same laptop may not provide the same key feel, brightness, light distribution, or long-term durability. Differences in LED placement, diffuser quality, keycap material, and internal construction can produce noticeable variations.
- Uneven brightness between keys
- Excess light leaking around key edges
- Dim legends that are difficult to read
- Incorrect color temperature
- Inconsistent brightness between keyboard zones
- Shorter backlight service life
A replacement that fits physically is not necessarily equal to the original assembly.
Used Keyboards May Carry Hidden Wear
A used keyboard can appear clean while already having weakened LEDs, worn cable contacts, liquid residue, or damaged light-guide layers. Backlighting should be tested across every key and brightness level before the laptop is fully reassembled.
Testing early can prevent repeated disassembly if the replacement part has its own defect.
Regional Keyboard Layouts Must Be Confirmed
Replacement keyboards may use different key shapes, symbols, language markings, and Enter-key layouts. Even when the electrical connection is compatible, the physical key arrangement may not match the operating system or the user’s needs.
Backlit key legends are manufactured into the keycaps, so changing the software keyboard language does not alter the printed or illuminated symbols.
The Original Backlight Color May Not Be Universal
Some laptop families are sold with white, red, blue, or RGB keyboard options. A replacement with a different lighting system may require another controller, cable arrangement, firmware feature, or software package.
A keyboard should not be selected only because its shape and screw positions match.
Motherboard Replacement Can Introduce Compatibility Problems
A replacement motherboard from another configuration of the same laptop family may lack the backlight connector or use different firmware. The computer may start and type normally while keyboard illumination remains unavailable.
Board part numbers, connector populations, and supported options should be compared before concluding that the keyboard is defective.
Reassembly Testing Should Occur Before the Bottom Cover Is Closed
After a keyboard, cable, or motherboard circuit has been repaired, the backlight should be tested before every screw and cover is reinstalled. This allows connector seating and cable placement to be corrected without repeating the entire disassembly process.
- Confirm that both keyboard and backlight cables are connected.
- Reconnect the battery and charger as required.
- Start the laptop and observe the keyboard during startup.
- Cycle through every brightness setting.
- Test all lighting zones or colors.
- Shut the laptop down and disconnect power again before final assembly.
Cable Routing Must Avoid Sharp Edges and Screw Holes
A backlight cable can work during an open-case test and fail after the bottom cover is installed if it becomes trapped beneath a bracket, battery edge, speaker, or screw post. The cable should follow its original path and remain flat without sharp bends.
Photographs taken before disassembly can help restore the intended routing.
Screw Lengths Must Return to Their Correct Locations
Laptop screws that look similar may have different lengths. A screw installed in the wrong location can press against the keyboard, puncture a cable, distort the palm rest, or create a bright spot in the backlight.
Screws should be organized during disassembly instead of placed together without location references.
Keyboard Flex Should Be Checked After Assembly
The keyboard should remain supported when keys are pressed. Excessive flex may indicate missing screws, damaged rivets, misaligned brackets, or a palm rest that is not fully clipped into place.
Structural movement can affect key feel and may eventually disturb the backlight cable or internal lighting layers.
All Keys Should Be Tested Along With the Lighting
A keyboard can illuminate correctly while one or more keys fail to register. Final testing should therefore include ordinary typing, modifier keys, function keys, the numeric keypad when present, and any manufacturer-specific controls.
This confirms that both the input connection and the separate lighting system were restored correctly.
Brightness Changes Should Be Smooth and Repeatable
The backlight should move through its available levels consistently without flickering, delayed response, or random shutdown. A problem that returns after the palm rest is pressed or the laptop is moved may indicate that the underlying connection remains unstable.
Sleep, Restart, and Shutdown Tests Can Reveal Incomplete Repairs
After the hardware appears to work, the laptop should be tested through several power states. The backlight should respond correctly after a restart, full shutdown, sleep cycle, and wake event.
If the failure returns only after sleep, the hardware repair may be complete while a software or controller problem remains.
Battery Operation Should Be Tested Separately
Keyboard lighting may follow different brightness and timeout rules when the charger is disconnected. Testing on both battery and AC power confirms whether the repaired system behaves correctly under each power profile.
| Final Test | Expected Result |
|---|---|
| Startup illumination | The keyboard follows the normal startup behavior for the model. |
| Brightness controls | Every available level responds consistently. |
| Typing test | All keys register without repeats, omissions, or unexpected characters. |
| Movement test | Lighting remains stable when the laptop is repositioned normally. |
| Sleep and wake | The backlight restores according to the configured setting. |
| Battery and charger modes | Lighting follows the intended power profile in both conditions. |
| RGB or zone test | All colors and sections respond without missing channels. |
Intermittent Problems May Require Extended Observation
A keyboard backlight that failed only after warming up, moving the case, or running for an extended period may not reveal the problem during a brief test. The laptop may need to remain powered while the lighting is observed through normal temperature changes and use.
Repeatedly twisting or pressing the case is not an appropriate test because it can create new damage.
Board-Level Repair Requires Accurate Circuit Information
When the motherboard does not provide backlight power, diagnosis may involve the fuse, switching transistor, resistor network, embedded controller signal, or damaged circuit traces. These components are small and may be located near other sensitive power circuits.
Testing should be guided by the board layout, schematic information when available, and known voltage expectations for the exact model.
Bypassing a Fuse Is Not a Proper Repair
A fuse protects the motherboard and connected keyboard from excessive current. Bridging it with solder or wire removes that protection and can allow a short circuit to damage additional components.
The failed fuse should be replaced with the correct type only after the cause of the failure has been identified.
Applying External Voltage Can Damage the Controller
Supplying power directly to a keyboard backlight without confirming the correct voltage, polarity, current limit, and pinout can destroy LEDs or send voltage into a control line. Improvised testing is especially risky on connectors with closely spaced contacts.
Measurements should be taken with appropriate tools rather than guessing from a similar laptop design.
Connector Replacement May Be Necessary
If the motherboard connector is cracked, corroded, or detached, replacing the keyboard will not restore reliable lighting. The damaged socket may need microsoldering repair using a compatible connector and intact motherboard pads.
When pads or traces have been torn from the board, additional reconstruction may be required.
Corrosion Can Extend Beyond the Visible Connector
Liquid residue may travel beneath a connector or nearby components through capillary action. Cleaning only the visible surface may leave conductive contamination or damaged traces underneath.
Magnification and electrical testing are often required to determine the full extent of the damage.
Some Backlight Problems Are Cosmetic Rather Than Functional
A small dim area may not interfere with typing, but it can indicate wear or contamination inside the keyboard. The decision to repair it may depend on the severity, replacement cost, laptop age, and whether the affected area is becoming worse.
Cosmetic symptoms should still be documented because they may help identify liquid exposure, case pressure, or a low-quality replacement part.
Complete Failure Can Be More Than an Inconvenience
A dark keyboard can make the laptop difficult to use in low-light environments. It may also indicate a disconnected cable, damaged connector, or electrical short that should not be ignored simply because typing still works.
The surrounding symptoms determine whether the problem is limited to illumination or connected to a larger internal issue.
Warning Signs That Suggest More Than a Simple Setting
- The backlight flickers when the case is moved.
- The keyboard became dark immediately after internal service.
- Liquid was spilled near the keyboard.
- The palm rest or keyboard is lifting.
- Lighting is accompanied by heat, odor, or discoloration.
- Only part of an RGB keyboard displays the correct colors.
- The keyboard cable or connector appears damaged.
- A replacement keyboard fails in the same way as the original.
These symptoms justify a closer inspection of the hardware and power circuit.
A Raised Keyboard Can Indicate Battery Swelling
If the keyboard surface is lifting, the touchpad is difficult to click, or the bottom case is separating, the laptop should be powered down and inspected for a swollen battery. Continued charging or pressure against the battery can increase the safety risk.
The battery problem should be corrected before the keyboard lighting is treated as an isolated cosmetic failure.
Heat or Burning Odor Requires Immediate Shutdown
Keyboard backlights normally consume relatively little power. Noticeable heat, smoke, odor, or discoloration near the keyboard or connector may indicate a short circuit or damaged component.
The laptop should not continue operating until the cause has been identified.
Liquid Exposure Should Be Addressed Before Corrosion Spreads
A backlight that becomes uneven or stops working after a spill may be an early sign of internal contamination. Waiting for additional symptoms can allow corrosion to spread through the keyboard connector and motherboard circuitry.
Drying the exterior does not remove conductive residue trapped inside the laptop.
Repeated Cable Reseating Can Make Damage Worse
Opening and closing a fragile connector multiple times can break its latch, wear the cable contacts, or lift the socket from the motherboard. Reseating should be performed carefully and only after power has been removed.
If the connection will not remain secure, the damaged part should be repaired rather than repeatedly repositioned.
Backlight Problems Can Help Reveal Previous Repair Quality
Missing screws, improvised tape, damaged latches, incorrect keyboard parts, and poor cable routing may become visible during backlight diagnosis. These conditions can explain why the problem appeared after an earlier repair.
Restoring the laptop properly may require correcting both the lighting fault and the underlying assembly issues.
Preventive Care Can Reduce Keyboard Damage
- Keep drinks away from the laptop keyboard.
- Avoid pressing heavily on the palm rest or key area.
- Do not carry the laptop by one corner while it is open.
- Use the correct disassembly procedure before replacing internal parts.
- Disconnect the battery before handling keyboard cables.
- Match replacement parts by exact model and part number.
- Stop using the laptop if the case begins separating.
Cleaning Should Not Force Liquid Beneath the Keys
Excess cleaning solution can enter the keyboard layers and affect both the key matrix and the backlight. A lightly dampened cloth is safer than spraying cleaner directly onto the keyboard.
Strong solvents may damage key markings, coatings, adhesives, and translucent legends.
Keycap Removal Is Not Appropriate for Every Keyboard
Laptop keycaps use small plastic hinges and retainers that can break easily. Removing keys to investigate lighting may damage the mechanism without providing access to the sealed backlight layer.
The keyboard design should be understood before individual keycaps are lifted.
Frequently Asked Questions About Laptop Keyboard Backlights
Can the keyboard still work if the backlight is broken?
Yes. Key input and backlight illumination often use separate circuits or cable conductors. The keyboard may type normally while the lighting remains completely dark.
Why does the keyboard light only when the laptop starts?
This behavior may indicate that the hardware works but an operating system setting, hotkey service, manufacturer utility, or power profile turns the backlight off after startup.
Can a loose cable cause flickering?
Yes. A partially inserted cable, damaged connector latch, worn contact, or cracked conductor can cause the backlight to flicker when the laptop is moved or the palm rest is pressed.
Why are some keys brighter than others?
Uneven brightness can result from failed LEDs, a damaged or misaligned light guide, contamination, case pressure, poor replacement quality, or incorrect keyboard assembly.
Can liquid damage affect only the backlight?
Yes. Liquid may damage the backlight cable, LED supply, connector, or lighting layers while the key-input circuit continues to operate.
Will reinstalling Windows restore the keyboard lighting?
It may help when the problem is caused by missing hotkey software, drivers, or manufacturer utilities. It will not repair a disconnected cable, failed LED layer, damaged connector, blown fuse, or motherboard fault.
Can every non-backlit laptop be upgraded to a backlit keyboard?
No. The motherboard may lack the required connector, power circuit, control signal, firmware support, or compatible palm-rest design.
Does a dark section mean the motherboard is failing?
Not necessarily. A localized dark section is often related to the keyboard’s internal LED group, light guide, or conductive paths. Motherboard problems more commonly affect the entire backlight, although zone-control circuits can vary by design.
Is it safe to keep using a laptop with no keyboard light?
It may be safe when the cause is only a disabled setting or failed lighting layer. Continued use is not recommended when the problem follows liquid exposure, case swelling, electrical odor, heat, or an internal repair that may have pinched the cable.
Why did the new keyboard backlight stop working immediately?
The replacement may be incompatible, non-backlit, defective, connected incorrectly, or exposed to an existing motherboard fault. The cable orientation, connector condition, supply voltage, and part number should be checked.
Reliable Diagnosis Separates Lighting Failure From Keyboard Failure
Laptop keyboard backlighting depends on more than the visible keys. The system may involve separate ribbon cables, LED groups, light-guide layers, motherboard power circuits, firmware commands, embedded controller behavior, and manufacturer software.
A keyboard that types normally can still have a failed backlight assembly. A keyboard that remains dark in Windows may still illuminate correctly in firmware. Uneven lighting may point toward an internal keyboard defect, while complete failure may involve settings, power delivery, or the motherboard connection.
The most effective repair begins by documenting the exact symptom, testing the lighting in different operating conditions, inspecting the internal connections safely, and confirming that the replacement part matches the laptop’s original configuration. This prevents unnecessary keyboard replacement and helps identify electrical or structural problems that could otherwise remain hidden.