How a Small Mounting Error Can Prevent a Desktop Computer From Starting
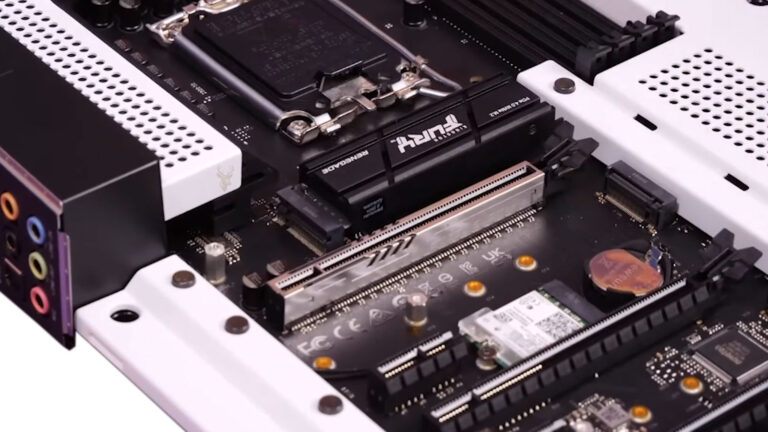
A desktop motherboard must be mounted securely inside the computer case without allowing its electrical contacts to touch the metal chassis. Small threaded supports called standoffs create the necessary separation between the circuit board and the case while also providing stable mounting points for the screws.
When the standoffs are installed in the correct positions, the motherboard remains supported and electrically isolated. A missing, loose, or incorrectly positioned standoff can allow the board to flex, move, or contact metal in an unintended location. The result may be a computer that refuses to start, shuts down immediately, restarts unexpectedly, or behaves differently whenever the case is moved.
What Motherboard Standoffs Do
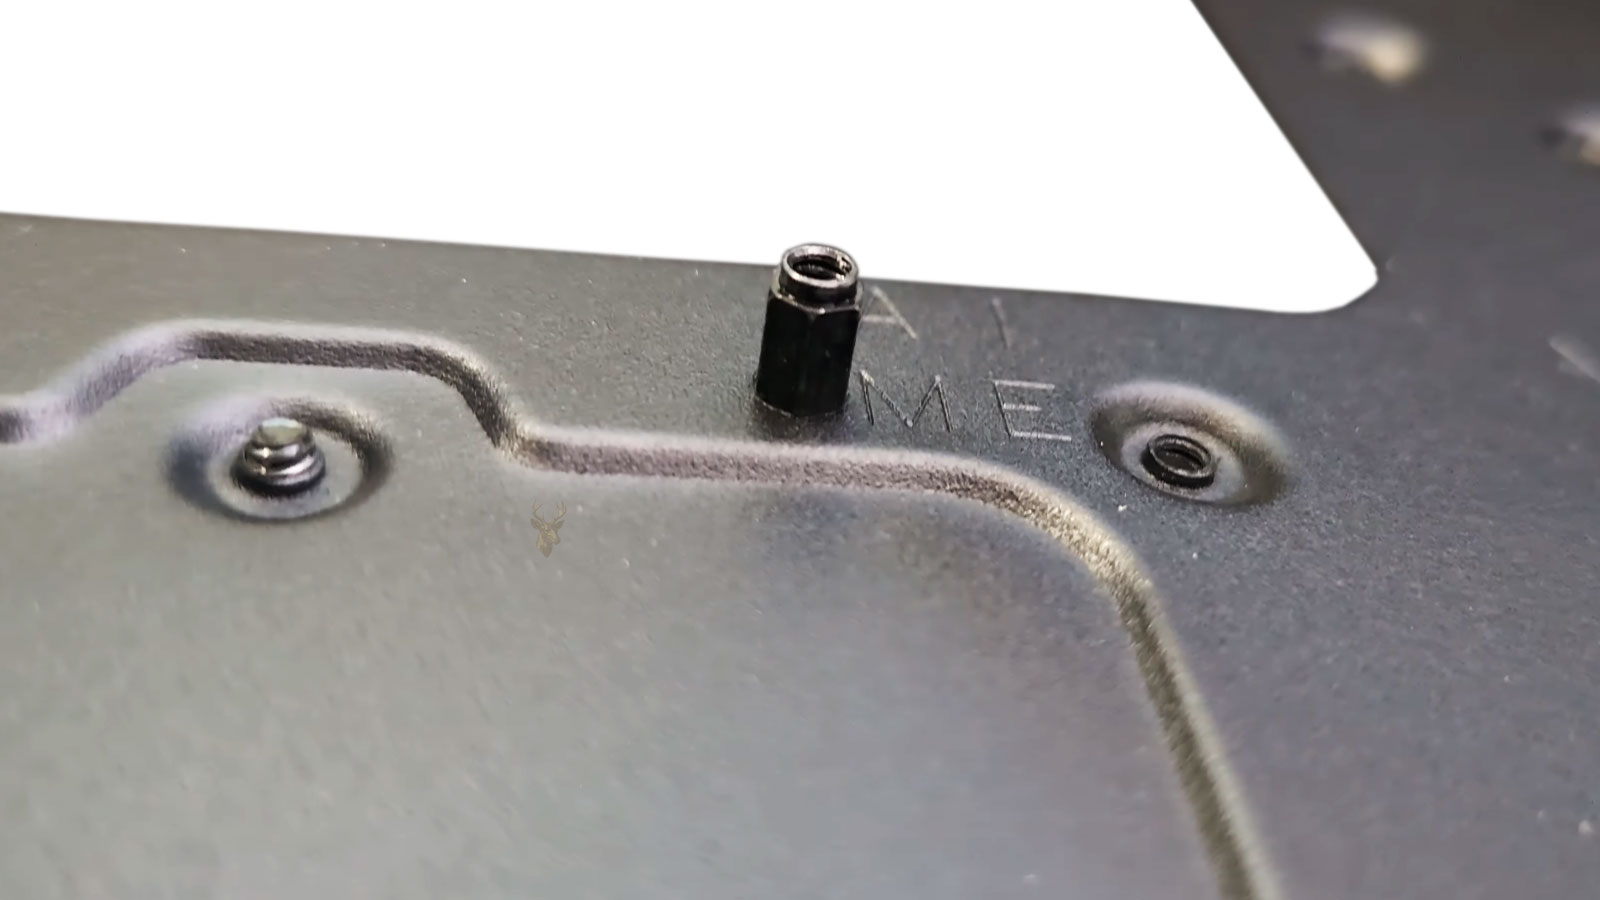
Motherboard standoffs are small metal or plastic spacers installed between the computer case and the motherboard. They align with designated mounting holes in the circuit board and hold it above the motherboard tray.
This separation is essential because the underside of a motherboard contains solder joints, conductive traces, component leads, and other electrical connections. If these areas press directly against the metal case, electricity may travel through an unintended path.
Standoffs provide mechanical support while preventing the underside of the motherboard from resting directly against the metal computer case.
Why the Mounting Holes Are Designed for Electrical Contact
The screw holes around a motherboard are not random openings. They are specifically positioned by the manufacturer to support the board safely. Many include conductive rings that are intended to make controlled contact with the mounting screw and standoff.
This controlled connection can contribute to grounding and mechanical stability. Contact outside these designated mounting areas is different because it may involve active circuitry, solder joints, or component connections that were never intended to touch the chassis.
How an Extra Standoff Creates a Short Circuit
Computer cases often support several motherboard sizes, so the motherboard tray may contain more threaded positions than a particular board requires. Only the positions that align with actual mounting holes should receive standoffs.
If an unused standoff remains beneath a solid area of the motherboard, it may press against solder points or exposed electrical contacts. Once power is applied, this contact can create a short circuit or interfere with normal signal paths.
- The computer may show no response when the power button is pressed.
- Fans may begin spinning and stop almost immediately.
- The power supply may repeatedly enter protection mode.
- The computer may restart before completing its startup checks.
- Behavior may change when the case is moved, lifted, or pressed.
A Short Circuit Does Not Always Produce Visible Damage
A motherboard contacting the case does not necessarily produce sparks, smoke, or a burned component. Modern power supplies and motherboard protection circuits may shut the system down before obvious damage occurs.
This can make the problem difficult to recognize. The system may appear to have a failed power supply, defective motherboard, damaged processor, or front-panel switch problem even though the underlying cause is incorrect physical mounting.
| Mounting Problem | Possible Result |
|---|---|
| Extra standoff beneath the board | Electrical short or immediate shutdown |
| Missing standoff | Board flexing when cables or memory are installed |
| Loose mounting screw | Movement, vibration, or inconsistent grounding |
| Incorrect screw type | Damaged mounting hole or insecure board support |
| Metal object trapped beneath the board | Intermittent or permanent electrical contact |
Missing Standoffs Can Also Cause Problems
An extra standoff can create unwanted electrical contact, but missing standoffs create a different type of risk. Unsupported areas of the motherboard may bend when memory modules, expansion cards, power connectors, or storage cables are installed.
Repeated flexing can place stress on solder joints, circuit board layers, and mounted components. A board may continue working initially but later develop intermittent failures after being pressed or moved during upgrades and maintenance.
Loose Screws and Hardware Beneath the Motherboard
A loose screw, metal washer, cable clip, or other conductive object can fall beneath the motherboard during assembly or repair. The object may remain unnoticed until the case is moved and it shifts into contact with electrical points.
This type of problem may cause inconsistent symptoms because the unwanted contact can appear and disappear depending on the position of the case. A computer may operate normally while lying on its side but fail after being placed upright.
When startup behavior changes after the computer is moved, loose mounting hardware or unintended case contact should be considered during diagnosis.
Why Symptoms Can Change After Reassembly
A desktop computer with a mounting-related short may behave differently each time it is opened and reassembled. Removing the motherboard can temporarily eliminate the unwanted contact, while reinstalling it may bring the problem back if the same standoff, screw, or trapped object remains in place.
This can create the impression that a cable, memory module, processor, or power supply was repaired simply because the computer starts after being taken apart. In reality, the change may have come from altering the physical position of the motherboard or moving conductive hardware away from the contact point.
Board Flexing During Component Installation
Installing memory modules, graphics cards, power connectors, and storage cables requires pressure. When the motherboard is fully supported, this pressure is distributed through the mounting points and into the case. When a standoff is missing, the unsupported area may bend toward the metal tray beneath it.
Excessive flexing can place strain on solder joints, internal circuit layers, sockets, and small surface-mounted components. The damage may not be visible, and the computer may continue operating until vibration, heat, or another service procedure causes the weakened connection to fail.
- Memory installation can flex the board near the DIMM slots.
- Main power connectors can place pressure near the board edge.
- Graphics card installation can stress the expansion slot area.
- Storage cables can pull on unsupported connectors.
- CPU cooler installation can bend the board around the processor socket.
Processor Cooler Pressure and Motherboard Alignment
Processor coolers apply controlled pressure to hold the heatsink against the processor. That pressure is expected, but the motherboard must be supported correctly around the socket area. Missing standoffs, uneven mounting, or a distorted case tray can allow the board to bend more than intended.
If the board flexes during cooler installation, the stress may affect processor socket contact, nearby memory traces, or solder connections. A computer may then show memory detection problems, startup failure, or instability that appears to be unrelated to the case mounting.
Proper motherboard support is part of processor cooler installation because mounting pressure must be distributed without bending the circuit board excessively.
The Role of Power Supply Protection
Many computer power supplies include protection circuits designed to stop operation when they detect an abnormal electrical condition. If a motherboard short draws excessive current, the power supply may shut down immediately or refuse to remain on.
This protective behavior can prevent more serious damage, but it can also make diagnosis confusing. A technician may see fans move briefly, lights flash, or hear a click from the power supply before everything turns off. The symptoms may resemble a defective power supply even when the unit is responding correctly to a short circuit elsewhere in the system.
| Observed Behavior | Possible Interpretation |
|---|---|
| Fans move for less than a second | Power protection may be reacting to a short |
| System starts after components are removed | Load reduction or changed board position may alter the fault |
| Power supply works in another computer | The original system may contain the electrical problem |
| Computer starts outside the case | Case contact or mounting hardware becomes more likely |
| Failure returns after final assembly | A standoff, screw, cable, or case position may be involved |
Testing a Motherboard Outside the Case
One common diagnostic method is to remove the motherboard from the case and test it on a clean, nonconductive surface with only the essential components connected. This is sometimes called bench testing.
If the computer starts reliably outside the case but fails after being installed, the difference points toward mounting pressure, case contact, trapped hardware, cable routing, or another physical condition created during assembly.
Bench testing does not automatically prove that a standoff is responsible, but it helps separate case-related conditions from faults that remain present regardless of where the motherboard is positioned.
Minimal Hardware Testing Reduces Confusion
When investigating a suspected case short, testing with fewer components can make the results easier to interpret. A basic configuration may include the motherboard, processor, required cooling, one memory module, power supply, and display output when supported.
Removing nonessential drives, expansion cards, accessories, and front-panel connections reduces the number of possible causes. Components can then be added back gradually after the system starts consistently.
- Inspect the motherboard tray and standoff positions.
- Remove loose screws and conductive objects.
- Test the board with only essential hardware.
- Confirm stable startup outside the case.
- Reinstall the board while checking every mounting point.
- Add remaining components one at a time.
Cable Routing Can Pull the Board Out of Position
Thick power cables and tightly routed connectors can place sideways pressure on the motherboard. If a cable is stretched too tightly behind the case tray or forced into a connector at an angle, it may lift an edge of the board or pull it against a standoff unevenly.
This pressure may not cause an immediate failure. Problems can appear later after the case is moved, a cable relaxes, or repeated heating and cooling changes the position of the board slightly.
Front-Panel Connections Can Complicate Diagnosis
The case power switch, reset switch, indicator lights, front USB ports, and audio connectors all attach to the motherboard. A damaged cable or incorrectly connected front-panel component can produce symptoms that resemble a motherboard mounting problem.
Disconnecting these accessories during minimal testing helps determine whether the failure comes from the case wiring, a front-panel circuit, or physical contact beneath the motherboard.
A case-related startup failure may involve more than the standoffs, so mounting hardware, cable pressure, and front-panel wiring should be evaluated together.
Inspecting Standoff Placement Before Reinstallation
Before a motherboard is returned to the case, every standoff position should be compared with the mounting holes in the board. A standoff should be present only where a matching screw hole exists. Any spacer beneath a solid section of the motherboard should be removed.
The case tray should also be checked for fixed metal bumps, raised areas, damaged threads, or bent sections. Some cases use formed mounting points instead of removable standoffs, and these must also align correctly with the motherboard design.
- Count the mounting holes in the motherboard.
- Confirm that each hole aligns with a standoff or approved case support.
- Remove every unused standoff beneath the board.
- Check that no standoff is loose or leaning.
- Inspect the case tray for deformation or raised metal.
Using the Correct Motherboard Screws
Computer cases may include several screw types that look similar but use different threads, head sizes, and lengths. A screw intended for a storage drive, fan, or case panel may not fit a motherboard standoff correctly.
Using the wrong screw can damage the standoff threads, fail to secure the board, or create excessive pressure around the mounting hole. A screw that is too small may remain loose, while one with the wrong thread can become stuck or strip the mounting hardware.
| Screw Problem | Possible Consequence |
|---|---|
| Incorrect thread pattern | Stripped or damaged standoff |
| Screw head too small | Insufficient support around the mounting hole |
| Screw tightened excessively | Cracked board material or damaged grounding ring |
| Screw left loose | Motherboard movement or vibration |
| Screw dropped beneath the board | Intermittent or immediate short circuit |
Motherboard Screws Should Be Secure, Not Overtightened
Motherboard screws need enough tension to prevent movement, but excessive force is unnecessary. Overtightening can damage the mounting ring, distort the board, strip the standoff, or make later removal difficult.
A properly installed screw should sit flat against the mounting area without forcing the motherboard downward. The screws can be tightened gradually in different areas so the board settles evenly across all mounting points.
Motherboard screws are intended to hold the board in position, not clamp it against the case with excessive force.
The Input and Output Shield Can Affect Alignment
The input and output shield around the rear motherboard ports can interfere with installation when its metal tabs are bent incorrectly. A tab may enter a USB, network, audio, or video port instead of resting around it. The shield can also push the motherboard away from its mounting holes if it is not seated fully in the case opening.
Forcing the board into position while the shield is misaligned can place sideways pressure on the ports and motherboard. It may also make the mounting screws difficult to start, encouraging the installer to pull the board into alignment with screw pressure.
Signs of Improper Rear Port Alignment
- Rear ports do not sit evenly within the shield openings.
- A metal tab is visible inside a connector.
- The motherboard must be pushed sideways to align the screws.
- Some mounting holes do not line up with their standoffs.
- Cables are unusually difficult to insert into the rear ports.
The motherboard should align naturally with both the rear port opening and the standoffs. If significant force is required, the cause should be corrected before any screws are tightened.
Case Damage Can Create New Contact Points
A computer case that has been dropped, bent, or handled roughly may no longer provide a flat mounting surface. The motherboard tray can bow inward, mounting points can shift, and expansion slot brackets can pull the board out of alignment.
Even when the original standoffs are positioned correctly, a distorted tray may move part of the case closer to the underside of the motherboard. This can create a contact point that did not exist when the computer was first assembled.
Expansion Cards Can Place Additional Stress on the Board
Large graphics cards and other expansion devices can place considerable weight on the motherboard. If the card is not secured properly to the case, movement can pull on the expansion slot and cause the board to flex.
Misaligned expansion slot brackets can also force the motherboard sideways when the card is screwed into place. The card should enter the slot evenly, and its metal bracket should align with the case without being pulled or twisted into position.
Insulating Washers Are Not a Universal Solution
Some older systems and specialized hardware may use insulating washers around certain mounting points, but adding washers randomly is not a reliable repair for a suspected short circuit. Motherboard mounting holes are normally designed to work directly with the correct screws and standoffs.
Washers cannot correct an extra standoff beneath the board, a bent case tray, a trapped screw, or a damaged circuit board. They may also interfere with the intended grounding connection around a mounting hole.
Checking the System After Installation
After the motherboard is installed, the system should be inspected before all panels and accessories are replaced. The board should sit flat, every screw should align with a proper mounting point, and no loose hardware should remain inside the case.
- Verify that the motherboard is level across the tray.
- Confirm that all screws are secure without being overtightened.
- Inspect the rear ports and expansion slot alignment.
- Check that cables are not pulling against the board.
- Look beneath and around the board for loose metal objects.
- Test several complete startup and shutdown cycles.
- Move the case gently and confirm that behavior remains stable.
When the Computer Starts Outside the Case but Not Inside It
A motherboard that works consistently during bench testing but fails after installation provides an important diagnostic clue. The case, mounting hardware, cable routing, rear shield, front-panel wiring, or expansion card alignment may be changing the electrical or physical conditions around the board.
The system should not be repeatedly powered on without correcting the cause. Although protection circuits may stop the computer before major damage occurs, repeated short-circuit conditions can still place unnecessary stress on the power supply and motherboard.
When Professional Diagnosis Is Appropriate
Professional diagnosis may be appropriate when the computer continues to shut down immediately, shows inconsistent startup behavior, or works only when the motherboard is positioned outside the case. A technician can inspect the mounting points, test the power supply, isolate connected hardware, and look for damage that may not be visible during a basic inspection.
Careful diagnosis is especially important when the computer stopped working after a case replacement, motherboard upgrade, major cleaning, cable-management change, or complete disassembly. These situations increase the possibility that a standoff, screw, connector, or alignment issue was introduced during reassembly.
Correct Mounting Protects Both Stability and Hardware
Motherboard standoffs are small parts, but their placement affects the electrical safety and mechanical support of the entire computer. Extra standoffs can contact active circuitry, missing supports can allow the board to flex, and loose hardware can create failures that appear only when the case is moved.
Matching every standoff to a designated mounting hole, using the correct screws, checking case alignment, and testing the system carefully after assembly can prevent difficult startup problems and reduce stress on the motherboard. When a computer behaves differently inside and outside its case, the mounting system should be treated as an important part of the diagnosis.