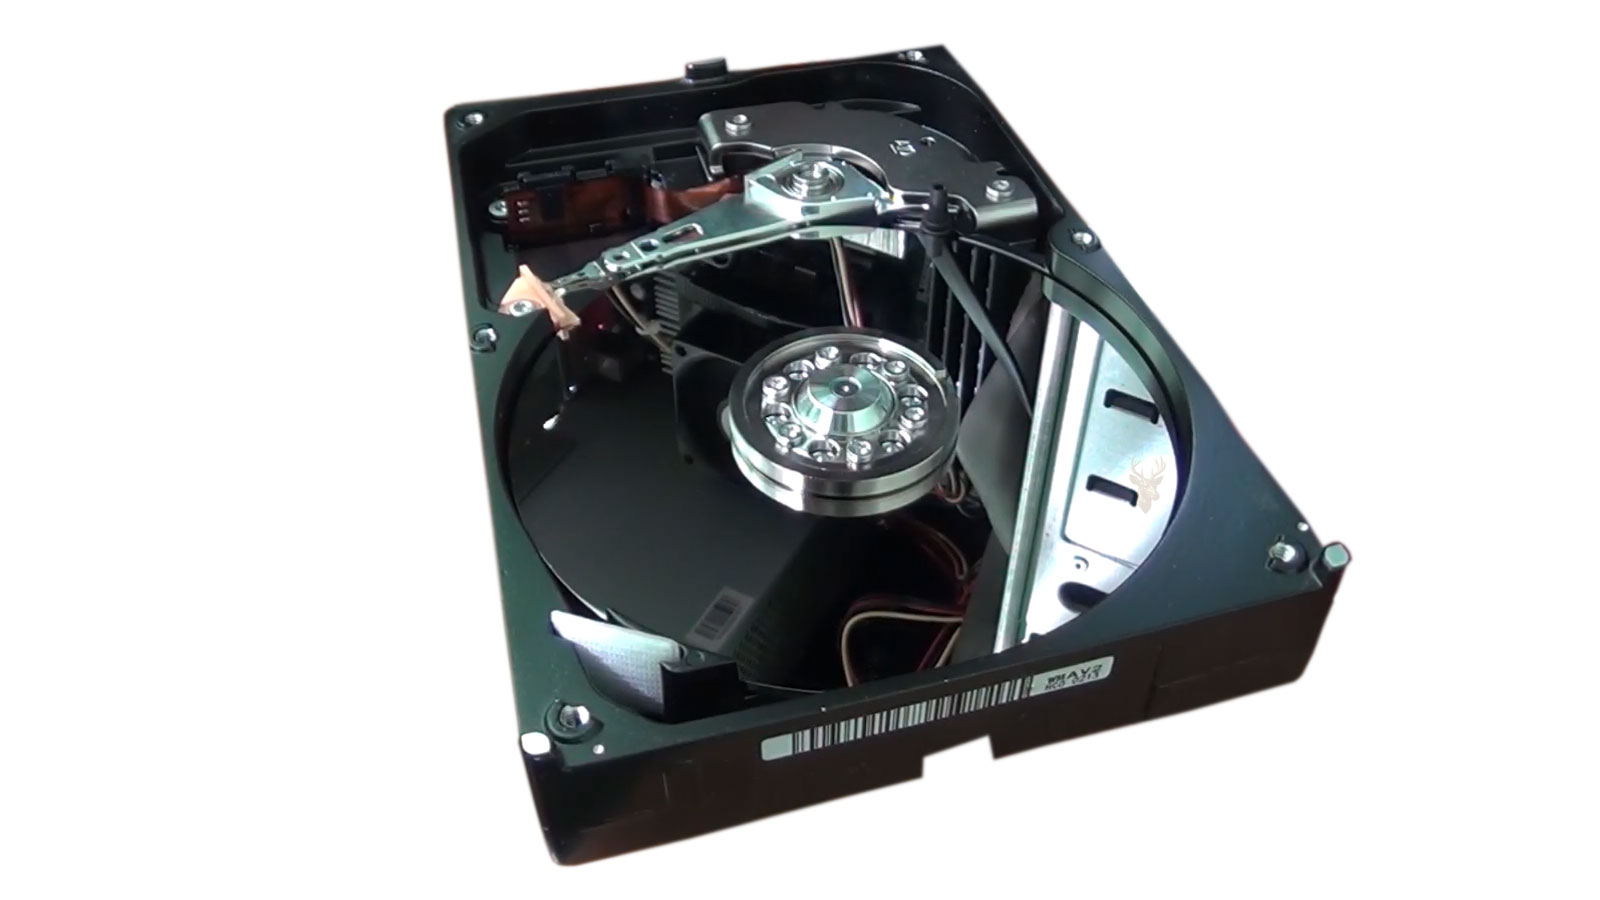
Disk Imaging Creates a Working Copy Before Recovery Begins
Data recovery often begins with a careful attempt to copy the contents of a storage device before files are examined or repaired. This process is known as disk imaging. Instead of repeatedly working from the original hard drive, solid-state drive, memory card, or other storage device, recovery work is performed on a separate copy whenever possible.
A disk image is designed to preserve more than the files that are currently visible. Depending on the method used, it may include active files, deleted data, file-system structures, unallocated space, partition information, and sectors that cannot be accessed through ordinary file copying.
This approach is especially important when the original storage device is unstable. Every additional read attempt can place more stress on failing hardware, so creating a usable image early can reduce the need to access the original device repeatedly.
A Disk Image Is Different From a Normal File Copy
Copying folders through File Explorer, Finder, or another file manager transfers files that the operating system can currently recognize and access. Disk imaging works at a lower level and attempts to reproduce the storage device itself rather than copying only the files shown to the user.
A normal file copy depends on the file system functioning well enough to locate folders, names, and file records. If the file system is damaged, a file copy may fail even when much of the underlying data still exists on the drive.
Disk-imaging software can read the storage device sector by sector or block by block. The resulting image can then be examined with recovery tools without requiring every operation to be repeated on the original hardware.
| Method | What it attempts to preserve | Main limitation |
|---|---|---|
| File copy | Accessible files and folders | Depends on a readable file system |
| Backup | Selected data from an operating system or application | May exclude deleted or damaged data |
| Disk image | Storage sectors, partitions, file-system structures, and recoverable data | May require specialized tools and sufficient destination capacity |
The difference becomes significant when data loss involves deleted partitions, damaged directories, corrupted file systems, or unstable hardware.
Sector-by-Sector Imaging Preserves the Structure of the Drive
Storage devices organize information into addressable sectors or blocks. A sector-by-sector image attempts to copy those areas in their original order from the source device to an image file or another storage device.
This method can preserve information that is not visible through the operating system, including deleted file remnants, partition boundaries, metadata, and unused areas that may still contain recoverable content.
The resulting image may be stored as a single image file or written directly to another device of equal or greater capacity. The format depends on the imaging software and the requirements of the recovery process.
Imaging Protects the Original From Repeated Recovery Attempts
Recovery tools may scan a storage device many times while searching for partitions, file records, deleted data, or recognizable file signatures. Performing all of those scans on the original drive can increase the amount of activity placed on already weakened hardware.
Once a sufficiently complete image has been created, multiple recovery methods can be tested against the copy. If one scan produces incomplete results, another approach can be attempted without requiring the original device to repeat the same workload.
- Partition-recovery scans can be performed on the image.
- File-system repair attempts can be tested without altering the source.
- Deleted-file searches can be repeated using different settings.
- File-carving tools can examine unallocated space.
- Recovered files can be compared without returning to the original drive.
This separation between the source and the working copy is one of the most important reasons disk imaging is used in professional recovery procedures.
Failing Drives May Become Less Readable Over Time
A storage drive with developing hardware problems may not remain in the same condition throughout the recovery process. Weak read heads, damaged media, unstable electronics, overheating, or a growing number of unreadable sectors can cause access to deteriorate.
A drive that is readable during the first attempt may begin disconnecting, slowing down, or refusing access later. For that reason, the first priority is often to capture as much readable information as possible while the device is still responding.
The goal of imaging is not to repair the original drive. The goal is to preserve readable data before the condition of the source becomes worse.
This approach changes the order of operations. File-system repair, virus scanning, operating-system startup attempts, and other modifications are usually postponed until the available data has been copied.
Unreadable Sectors Require Controlled Handling
When imaging software encounters a damaged or unreadable area, it may slow down, retry the same location repeatedly, skip the area temporarily, or stop completely. The behavior depends on the software and its configuration.
Repeatedly retrying a difficult sector can place unnecessary stress on a failing drive and delay access to healthier areas. Recovery-oriented imaging tools often use strategies that prioritize easily readable sections before returning to damaged locations.
A controlled imaging process may:
- Copy large readable areas with minimal retries.
- Record which sections could not be read.
- Return to skipped areas using smaller read sizes.
- Attempt limited retries on the most important missing regions.
- Stop if the drive becomes unstable or begins deteriorating rapidly.
This staged method helps avoid spending excessive time on one damaged area while large amounts of readable data remain elsewhere on the device.
The Destination Must Have Enough Reliable Storage
A complete disk image generally requires destination capacity equal to the full size of the source device, not merely the amount of space occupied by visible files. A one-terabyte source drive may therefore require approximately one terabyte of available destination space even when only part of the drive contains active data.
Additional capacity may also be needed for recovered files, temporary scan data, software output, and a second working copy. The destination should be healthy and reliable because any failure there can compromise the imaging process or the recovered data.
Writing the image back to the same failing drive would defeat the purpose of preservation and could overwrite data that has not yet been recovered.
An Image File and a Cloned Drive Serve Similar but Different Purposes
A storage device can be imaged into a file or cloned directly onto another drive. Both approaches create a separate working copy, but they differ in how the copy is stored and used.
| Copy type | Typical use | Practical consideration |
|---|---|---|
| Image file | Analysis with recovery or forensic software | Easy to duplicate, archive, or mount with compatible tools |
| Drive-to-drive clone | Hardware testing or direct access through another device | Requires a destination drive of sufficient size |
| Sparse image | Copying selected readable regions or used areas | May not preserve every sector from the source |
An image file is often more flexible because it can be copied without needing another physical drive each time. A clone can be useful when software expects direct access to a storage device or when the copy must be tested in hardware.
Imaging Does Not Automatically Recover the Files
Creating a disk image preserves the available contents of the source, but it does not necessarily restore file names, repair corrupted folders, or identify deleted data. Recovery analysis usually begins after the image has been created.
The image may then be examined for intact partitions, damaged file systems, deleted records, or recognizable file signatures. The method used depends on what caused the data loss and how much of the original structure remains.
If the source contained severe corruption, the image will usually contain that same corruption. Its value is that the damage can now be examined repeatedly without continuing to rely on the original device.
Some Storage Failures Require More Than Software Imaging
Disk imaging is most useful when the device still responds well enough to provide readable data. A drive with failed electronics, severe mechanical damage, internal contamination, or complete loss of communication may require hardware-level repair or laboratory procedures before imaging can begin.
Unusual clicking, scraping, repeated spin-up attempts, burning odors, or a drive that is not identified correctly may indicate a condition in which continued power-on testing could worsen the damage.
In those cases, the decision to continue should be based on the importance of the data and the condition of the device rather than on whether ordinary imaging software is available.
Disk Imaging Establishes a Safer Foundation for Recovery
The purpose of disk imaging is to capture the readable state of a storage device before additional analysis or repair is attempted. It reduces dependence on the original hardware, preserves low-level structures, and allows multiple recovery techniques to be tested against a working copy.
In the next part, we’ll examine the different imaging strategies used for healthy and failing drives, how recovery software handles unreadable sectors, and why read order, retry limits, and destination selection can influence the amount of data preserved.
Different Imaging Strategies Are Used for Different Drive Conditions
A healthy storage device and a failing storage device should not always be imaged in the same way. A stable drive can often be copied in a straightforward sequence, while an unstable drive may require a more cautious process that reduces retries, skips damaged areas, and records progress for later passes.
The imaging strategy should reflect the condition of the source, the importance of the data, the type of storage device, and the amount of time the hardware may remain readable.
Using an aggressive approach on a weakened drive can waste valuable time or increase stress before the most accessible data has been preserved.
Healthy Drives Can Usually Be Read in a Continuous Sequence
When a drive is stable, correctly identified, and free from obvious hardware symptoms, imaging software can usually read from the beginning of the device to the end in a continuous pass.
This method is appropriate when the goal is to preserve a drive before file-system repair, examine deleted data, duplicate a working storage device, or create a complete archival copy.
- The drive remains connected without interruption.
- Read speed stays reasonably consistent.
- No unusual noises or repeated resets occur.
- The operating system reports the correct drive capacity.
- Only a small number of read errors appear, if any.
Even when the drive appears healthy, the image should still be written to a separate destination. The source should remain unchanged until the image has been verified.
Failing Drives Often Require a Multi-Pass Approach
A failing drive may contain large readable areas mixed with smaller damaged regions. Attempting to recover every difficult sector during the first pass can slow the process dramatically and place repeated stress on the hardware.
Recovery-oriented imaging software often performs several passes. The first pass focuses on collecting data that can be read quickly. Later passes return to skipped areas with smaller read sizes or limited retry attempts.
| Imaging pass | Primary objective | Typical behavior |
|---|---|---|
| Initial pass | Capture large readable regions | Minimal retries and rapid skipping of damaged areas |
| Secondary pass | Fill smaller gaps | Reduced block size and targeted reads |
| Retry pass | Attempt difficult sectors | Limited retries on remaining unreadable locations |
| Final review | Evaluate what remains missing | Compare unread areas with important file-system structures |
This sequence prioritizes the greatest amount of recoverable information before the device condition has an opportunity to deteriorate further.
Read Order Can Affect the Amount of Data Preserved
Most imaging begins at the start of the drive and proceeds toward the end, but that is not always the best approach for unstable hardware. Some tools can read in reverse, alternate between regions, or skip ahead when a damaged area causes long delays.
Changing the read order may help when one section of the drive is causing repeated errors while other regions remain accessible. It can also allow important file-system structures located elsewhere on the device to be preserved before the drive stops responding.
No single direction guarantees better results. The appropriate method depends on the location of the damage, the behavior of the device, and whether specific partitions or file types are more important than others.
Large Read Blocks Improve Speed but May Skip More Data
Imaging software often reads groups of sectors together in larger blocks. Large blocks improve speed because the software performs fewer individual read operations.
When a large block contains an unreadable sector, the entire block may initially be skipped. A later pass can return using smaller blocks to isolate the damaged area and recover the readable sectors surrounding it.
This creates a balance between speed and precision:
- Large blocks help preserve healthy areas quickly.
- Medium blocks narrow down damaged regions.
- Small blocks recover readable sectors close to the damage.
- Single-sector attempts may be reserved for the final stage.
Starting with the smallest possible read size can make the imaging process unnecessarily slow, especially when most of the drive remains readable.
Retry Limits Prevent One Area From Consuming the Entire Process
A damaged sector may require multiple read attempts before it responds, but repeated retries are not always beneficial. A drive can spend minutes or longer attempting one location while thousands of readable sectors remain elsewhere.
Setting controlled retry limits allows the software to record the unreadable area and continue. Additional attempts can be made later if the drive remains stable.
Recovery imaging should prioritize preserving available data, not forcing every damaged sector to respond during the first pass.
Excessive retries may also increase heat, mechanical activity, and the likelihood of disconnection on a failing device.
A Map File Records What Has and Has Not Been Read
Many recovery-oriented imaging tools create a map file or log that records the status of each area on the source device. The map distinguishes between completed regions, skipped sections, unreadable sectors, and areas that still require another pass.
This information allows the imaging process to resume without starting over after a power interruption, software restart, or temporary drive disconnection.
- Successfully copied regions do not need to be read again.
- Skipped areas can be targeted during later passes.
- Unstable regions can be approached with different settings.
- Progress can be reviewed before deciding whether to continue.
Without a reliable map, an interrupted recovery may repeat large amounts of unnecessary work and place additional stress on the source.
Drive Resets and Disconnections Interrupt Imaging
A failing drive may disappear from the system, reset its connection, report the wrong capacity, or become unresponsive during imaging. These events can occur because of internal hardware problems, unstable electronics, cable issues, power irregularities, or overheating.
When the device disconnects, imaging software may pause, stop, or mark the affected area as unreadable. Repeatedly restarting the drive can sometimes restore temporary access, but every power cycle introduces additional risk.
The cause of the interruption should be evaluated before imaging continues. A poor cable or unstable USB adapter may be corrected without changing the drive itself, while internal mechanical or electronic failure requires greater caution.
Direct Connections Are Usually More Reliable Than USB Adapters
USB adapters and external enclosures are convenient, but they can interfere with low-level access to a failing drive. Some adapters hide error information, reset when a read takes too long, or prevent recovery software from controlling timeouts and retry behavior.
A direct SATA or other native connection may provide more stable communication and better access to device status information. However, the correct connection method depends on the storage type and the available equipment.
For removable memory cards and specialized storage devices, a compatible reader is still required, but the reader itself should be reliable and known to handle errors without disconnecting unnecessarily.
Power Stability Is Important During Long Imaging Sessions
Imaging can continue for many hours or even days when a large drive contains damaged sectors. A power interruption can stop the process and may leave the source in a less stable condition when it is restarted.
The computer, destination storage, and source drive should receive stable power. Loose connectors, weak power supplies, and unreliable external adapters can create interruptions that resemble drive failure.
A map file makes recovery from an interruption easier, but preventing unnecessary shutdowns is still preferable.
Drive Temperature Can Influence Read Stability
Storage devices generate heat during continuous reading. A drive with weakened electronics, bearings, flash memory, or controller components may become less stable as its temperature rises.
Read speed may decrease, error rates may increase, or the device may disconnect after extended activity. Adequate airflow can help keep the drive within a safer operating range during imaging.
Extreme cooling methods should not be used casually. Condensation, rapid temperature changes, and improper handling can create additional damage. Temperature management should focus on stable, controlled airflow rather than improvised freezing techniques.
Solid-State Drives Fail Differently From Mechanical Drives
Hard drives and solid-state drives can both require imaging, but their failure behavior is different. Mechanical drives may develop weak heads, damaged platters, motor problems, or unstable movement. SSDs depend on flash memory, a controller, firmware, and translation tables that map logical addresses to physical storage cells.
An SSD may remain readable at normal speed and then suddenly disappear, enter a read-only state, report an incorrect capacity, or stop responding entirely. This can leave less warning time than some mechanical failures provide.
| Storage type | Possible imaging difficulty |
|---|---|
| Mechanical hard drive | Slow reads, clicking, bad sectors, repeated recalibration, heat-related instability |
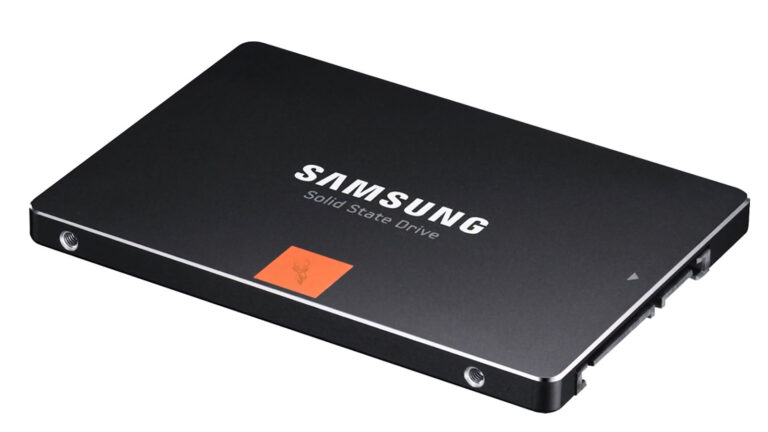
| SATA SSD | Controller resets, read-only behavior, sudden loss of detection |
| NVMe SSD | Thermal throttling, controller failure, rapid disconnection, firmware instability |
| Memory card | Unstable readers, controller failure, incorrect capacity, intermittent detection |
Because SSD failure can progress quickly, imaging should begin promptly when the device is still readable and the data is important.
Encryption Can Affect What the Image Contains
A sector-by-sector image of an encrypted drive preserves the encrypted data exactly as it exists on the source. The image does not automatically remove BitLocker, FileVault, hardware encryption, or another encryption layer.
Recovery still requires the correct password, recovery key, account credential, or decryption information. Without it, the image may be complete but the files may remain inaccessible.
If the drive is currently unlocked and readable through the operating system, it may also be possible to create a logical copy of the decrypted files. However, that approach does not preserve deleted data or every low-level structure in the same way as a full image.
Imaging a Larger Drive Does Not Require Every Sector to Contain Data
A full image usually reflects the total addressable size of the source device, including unused space. This is necessary when deleted files, lost partitions, or damaged file-system structures may exist outside the currently occupied areas.
Some image formats support compression or sparse storage so that empty or repetitive regions consume less destination space. However, the imaging method should not omit sectors that may contain recoverable information merely because the operating system considers them unused.
The destination should still have enough capacity for the image, recovery output, and any additional copies required during analysis.
The Best Image Is the One That Preserves the Most Useful Data Safely
A perfect sector-for-sector copy is not always possible when the source has physical damage. The practical goal is to capture as much readable information as possible without causing unnecessary deterioration.
Some missing sectors may contain unused space, while others may hold file-system records or parts of important files. The value of a partially complete image depends on where the unreadable areas are located and what information they affect.
In the final part, we’ll examine how an image is verified and analyzed, how recovered files are extracted without modifying the copy, and why checksums, write protection, documentation, and multiple working copies can improve the reliability of the recovery process.
Verifying an Image Confirms That the Copy Can Be Used Reliably
After an image has been created, the next step is verifying that the copied data is usable. Verification helps determine whether the imaging process completed as expected and whether the destination accurately reflects the information that was successfully read from the source.
Verification does not restore unreadable sectors that could not be copied. Instead, it confirms the integrity of the information that was successfully preserved and identifies areas that remain incomplete.
Many imaging tools automatically compare the completed image against the original during the verification stage, provided the source remains accessible long enough to perform the comparison.
Checksums Help Confirm Data Integrity
A checksum is a mathematical value calculated from digital data. If two identical copies produce the same checksum, there is strong evidence that the copied information has not changed.
Checksums are commonly used during imaging, storage, and long-term archiving because they provide a quick method of confirming that files or images remain unchanged after being copied or transferred.
| Verification method | Purpose |
|---|---|
| Checksum comparison | Confirms copied data has not changed |
| Image verification | Validates that the image can be read correctly |
| File comparison | Checks extracted files against expected results |
| Recovery log review | Documents unreadable or skipped sectors |
Different checksum algorithms exist, but their shared purpose is to detect unexpected changes rather than recover missing information.
Recovery Analysis Is Usually Performed on the Image Instead of the Original
Once the image has been verified, recovery software examines the copy rather than repeatedly accessing the original storage device. This protects the source from unnecessary wear while allowing multiple recovery techniques to be attempted safely.
The image may be scanned for existing partitions, deleted partitions, damaged file systems, directory structures, deleted file records, and recognizable file signatures. Because the original device is no longer required for each scan, different methods can be compared without increasing hardware stress.
If additional recovery software becomes available later, the preserved image can often be analyzed again without reconnecting the original drive.
Recovered Files Should Be Saved to Separate Storage
Files extracted during recovery should never be written back into the image or onto the original storage device. Instead, they should be copied to another healthy destination that has sufficient available space.
Saving recovered files separately preserves the original image exactly as it was created. If additional recovery attempts are needed later, they can begin from the untouched image instead of one that has already been modified.
- Keep the original storage device unchanged.
- Preserve the completed disk image.
- Extract recovered files to separate storage.
- Create additional copies of important recovered data.
This layered approach reduces the risk of accidental overwriting and provides multiple opportunities for additional recovery work if necessary.
Some Images Can Be Mounted Like Virtual Drives
Many imaging formats allow the completed image to be mounted as though it were a physical storage device. When mounted, compatible software can browse folders, inspect files, and examine partitions without altering the stored image itself.
This capability allows investigators, technicians, and recovery software to examine the preserved data using familiar file-management tools while keeping the underlying image unchanged.
If the image contains file-system corruption, mounting may not always succeed. In those situations, specialized recovery software can often analyze the raw image directly.
Write Protection Helps Preserve Original Evidence
Whenever possible, the original storage device should remain protected from modification during imaging and recovery. Even seemingly harmless actions, such as allowing an operating system to mount a drive automatically, can update timestamps, logs, or other file-system information.
Write-blocking hardware and software are commonly used when preserving evidence or when maintaining the exact condition of a storage device is important. These tools allow information to be read without permitting changes to be written back to the source.
Although not every recovery requires formal write protection, avoiding unnecessary modifications remains a good practice whenever valuable data is involved.
Recovery Logs Document What Happened During Imaging
Professional imaging software usually creates detailed logs that record the progress of the recovery session. These logs may include device identification, read errors, skipped sectors, retry counts, transfer rates, interruptions, and verification results.
The documentation provides valuable context when reviewing recovery results or deciding whether additional imaging attempts are worthwhile.
| Recovery log entry | Why it matters |
|---|---|
| Read errors | Identifies damaged areas on the source |
| Skipped sectors | Shows which regions remain incomplete |
| Retry attempts | Indicates how difficult certain areas were to read |
| Verification results | Confirms the completed image was checked |
| Completion statistics | Summarizes the overall imaging process |
Keeping these records makes future analysis easier, particularly if another recovery attempt becomes necessary months or years later.
Multiple Copies Improve Long-Term Protection
Once important information has been recovered, relying on a single copy introduces unnecessary risk. Hardware failures, accidental deletion, corruption, or physical damage can affect any storage device over time.
Creating additional copies on separate storage devices provides greater protection against future loss. The original image, extracted files, and verified backup copies each serve different purposes within a complete preservation strategy.
- Keep the original image unchanged.
- Maintain at least one verified backup copy.
- Store important copies on separate physical devices.
- Periodically verify archived images remain readable.
Long-term preservation depends not only on successful recovery but also on maintaining reliable copies afterward.
Some Damage Cannot Be Recovered Even From a Complete Image
A disk image reflects only the information that could be read from the source. If sectors were permanently unreadable, the corresponding information may remain incomplete regardless of how many times the image is analyzed.
Missing portions of a file may result in documents that open with missing pages, photographs containing visual corruption, videos that stop unexpectedly, or databases that cannot be fully reconstructed.
The quality of the final recovery therefore depends on both the condition of the original storage device and the amount of readable information preserved during imaging.
Disk Imaging Supports Both Recovery and Digital Preservation
Although disk imaging is commonly associated with recovering data from failing storage devices, it is also valuable for preserving historical systems, creating research archives, documenting computer configurations, and protecting information before risky maintenance procedures.
Because the image captures the storage device at a specific point in time, it provides a reference that can be examined repeatedly without depending on the continued health of the original hardware.
Imaging Is One Step Within a Larger Recovery Process
Disk imaging is an important part of many recovery procedures, but it is only one stage in a broader workflow. Successful recovery also depends on correctly identifying the cause of the failure, preserving the original device, selecting appropriate recovery methods, verifying recovered information, and maintaining reliable backups afterward.
When performed carefully, disk imaging creates a stable working copy that allows recovery efforts to continue with less risk to the original storage device. Whether the goal is recovering lost files, examining damaged file systems, or preserving valuable digital information, creating the image first often provides the safest foundation for everything that follows.