A Dark Laptop Screen May Still Be Producing an Image
A laptop display can appear completely black even though the computer has started and the LCD panel is still creating an image. When a bright flashlight is directed across the screen at an angle, a faint desktop, manufacturer logo, sign-in window, or moving pointer may become visible.
This test suggests that image data is reaching the panel but the light behind the image is missing or extremely weak. Modern laptop screens depend on an LED backlight to make the picture visible. Without that illumination, the LCD can continue changing pixels while appearing black under normal room lighting.
The symptom may begin suddenly, appear only at certain lid angles, or develop as intermittent flickering before the screen becomes permanently dark. Identifying whether the image itself is present helps separate a backlight problem from a computer that is not starting, a failed graphics system, or a completely disconnected display.
The LCD Image and the Backlight Perform Different Jobs
A laptop display assembly contains components that create the image and components that illuminate it. The LCD layer controls the color and brightness pattern of individual pixels, while the backlight provides the light that passes through those pixels toward the viewer.
If the image circuit continues working but the illumination circuit fails, the screen can still contain a complete picture that is difficult to see.
| Display Function | What It Controls |
|---|---|
| LCD pixel operation | Forms text, colors, windows, and images |
| LED backlight | Provides illumination behind the LCD |
| Display cable | Carries image, control, and power connections |
| Motherboard graphics output | Produces the image signal sent to the panel |
| Brightness control | Adjusts the requested backlight level |
A failed backlight does not necessarily mean that every part of the screen assembly has failed. The panel, cable, motherboard circuit, and software controls must be considered separately.
The Flashlight Test Helps Confirm That an Image Is Present
The flashlight test is performed after confirming that the laptop appears to be running. The screen is viewed closely while a bright light is directed across its surface rather than straight toward the viewer.
- Start the laptop and allow time for Windows or the startup logo to appear.
- Reduce room lighting when practical.
- Shine a flashlight across the display at a shallow angle.
- Look for faint icons, text, a logo, or pointer movement.
- Change the viewing angle and inspect several areas of the screen.
A faint but recognizable image strongly directs attention toward the backlight system. If no image is visible, the computer may still have a display cable, panel, graphics, memory, startup, or power problem.
The flashlight test identifies missing illumination; it does not identify which backlight component has failed.
External Monitor Testing Separates the Internal Screen From the Rest of the Computer
Connecting a compatible external monitor or television can help determine whether the laptop is producing a usable video signal. If the external display works normally while the internal screen remains extremely dark, the failure is more likely within the laptop display assembly or its supporting circuit.
The external screen may not activate immediately. The operating system may need to load, or a display-switching keyboard command may be required.
- Use a known-working monitor, cable, and input.
- Confirm that the external display is set to the correct source.
- Allow the laptop enough time to complete startup.
- Try the manufacturer’s display-switching key combination.
- Check whether the external image remains stable under ordinary use.
A working external monitor does not prove that the graphics system is perfect, but it shows that the laptop is capable of producing an image outside the internal panel.
Modern Laptop Panels Usually Use LED Backlighting
Older laptop displays often used fluorescent lamps powered by a separate high-voltage inverter. Most modern laptop panels use light-emitting diodes and do not contain the same external inverter arrangement.
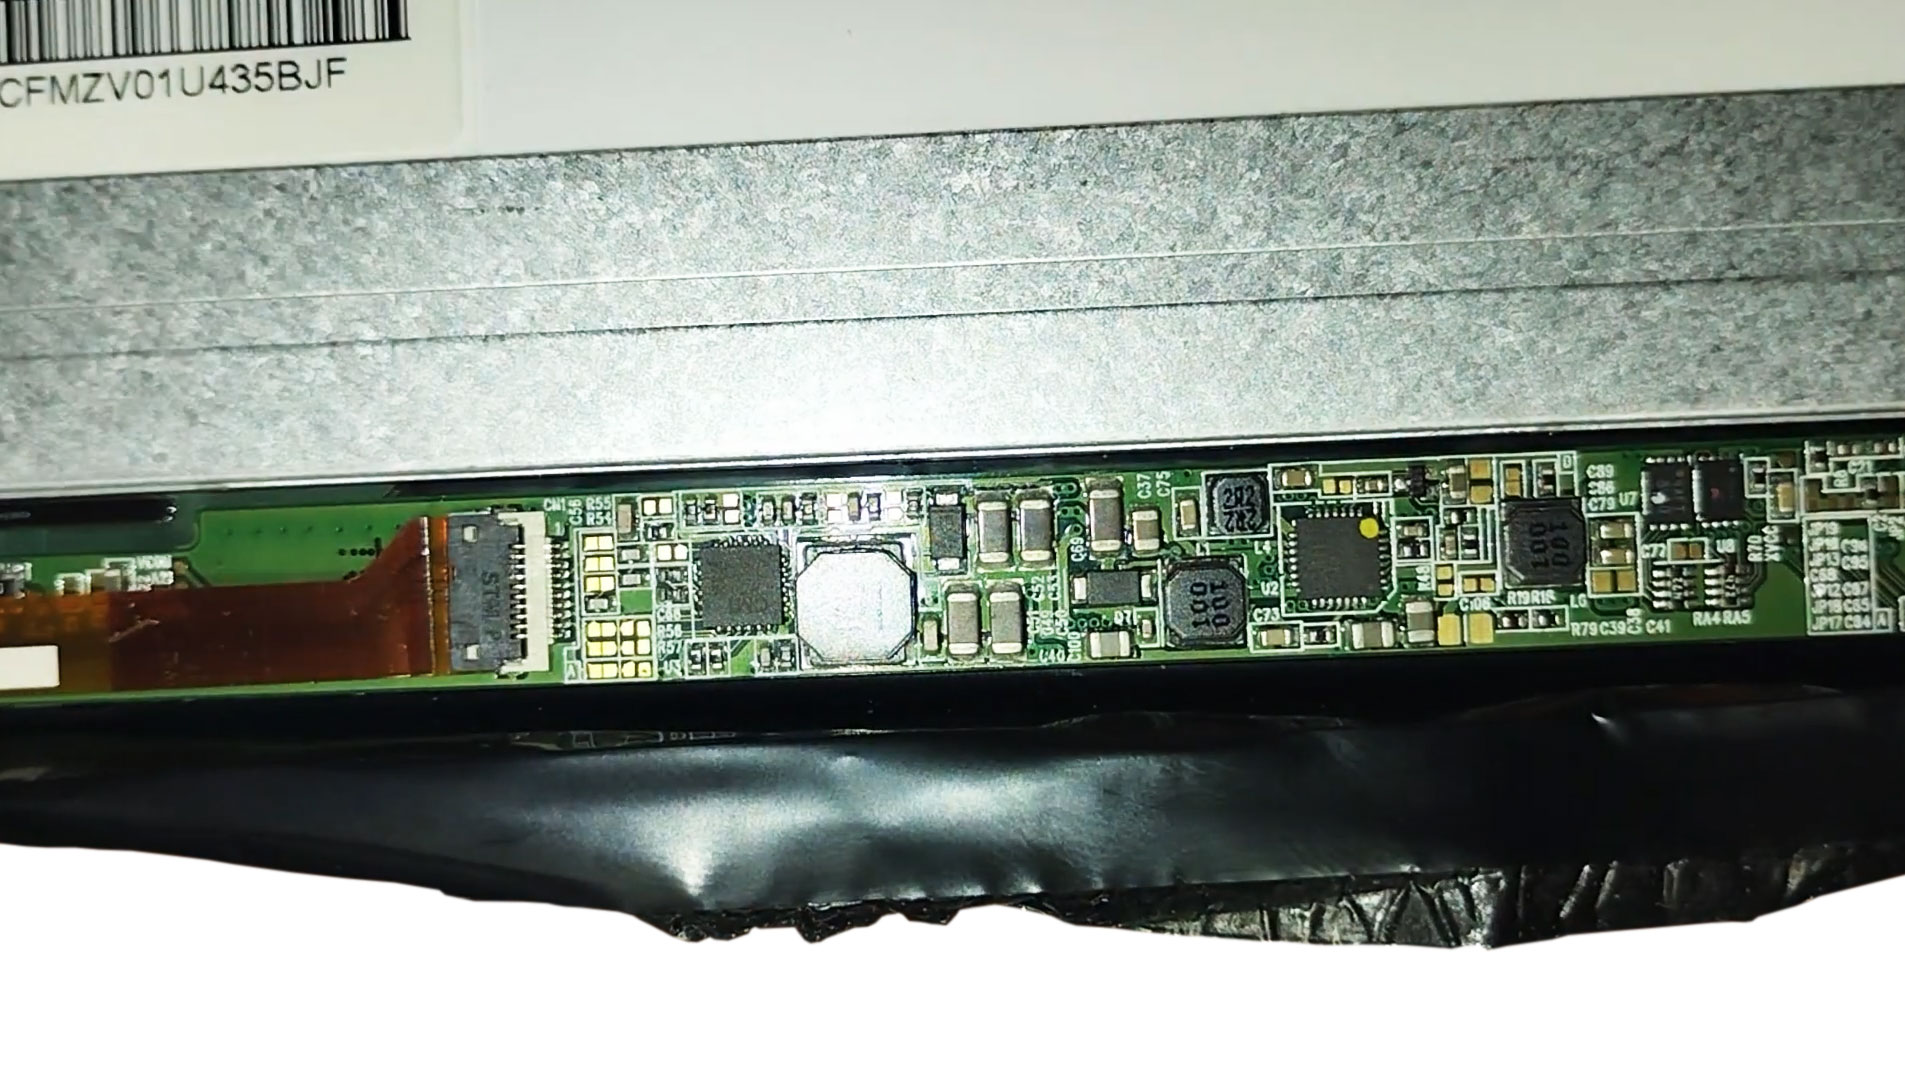
The LED backlight may receive power through the display cable from circuitry on the motherboard, and some regulation components may be built into the panel itself.
| Display Generation | Typical Illumination System |
|---|---|
| Older LCD laptop | Fluorescent lamp with a separate inverter board |
| Modern LCD laptop | LED backlight powered through the display connection |
| Touchscreen assembly | LED-backlit LCD combined with touch and glass layers |
| OLED laptop display | Pixels produce their own light without a conventional backlight |
The exact display technology matters because diagnostic steps and replacement parts differ. An inverter intended for an older fluorescent screen is not part of a typical modern LED panel repair.
A Failed LED Backlight Inside the Panel Can Leave the Image Intact
The LED strips inside the panel can fail electrically or develop an open circuit. In many laptop screens, these LEDs are not serviced separately during ordinary repair. The complete LCD panel is replaced instead.
Backlight failure inside the panel may occur suddenly or begin with symptoms that become more frequent over time.
- The screen flashes normally for a moment and then becomes dark.
- Brightness becomes uneven across the display.
- The picture flickers before the illumination disappears.
- The screen works when cold but darkens after warming.
- A faint image remains visible throughout the failure.
These patterns support a backlight-related diagnosis, but similar behavior can result from cable damage or unstable backlight power from the motherboard.
The Display Cable Carries More Than the Image Signal
The internal display cable typically carries image data, panel power, backlight power, brightness control, and other signals through the hinge area. Damage to one portion of the cable can affect illumination while allowing the faint image to remain.
The cable bends whenever the lid is opened or closed. Over time, repeated movement, hinge damage, pressure, or incorrect routing can weaken internal conductors.
| Cable-Related Symptom | Possible Meaning |
|---|---|
| Backlight changes with lid movement | Conductors may be damaged near the hinge |
| Screen flickers when the bezel is pressed | Panel connector or cable contact may be unstable |
| Image remains faint at every angle | Backlight power path may be continuously open |
| Colored lines appear with darkness | More than one cable signal may be affected |
| Display cuts out after a previous repair | Cable routing or connector seating should be checked |
A cable should not be replaced solely because lid movement changes the symptom. A loose panel connector, damaged hinge, or pressure against the display assembly can create a similar response.
Loose Display Connections Can Interrupt Backlight Power
The display cable connects at the motherboard and at the rear of the LCD panel. If either connection is partially seated, the image or backlight may fail intermittently.
This is more likely after a screen replacement, hinge repair, motherboard service, or accidental impact. Adhesive tape that originally secured the panel connection may also be missing or incorrectly positioned.
- Disconnect the charger and internal battery before handling the display connection.
- Inspect the motherboard-side connector for alignment and damage.
- Check that the panel-side plug is inserted evenly.
- Confirm that the cable is secured without excessive tension.
- Inspect the cable route through the hinge before reassembly.
Connecting or disconnecting a laptop display cable while battery power remains present can damage the panel, cable, or motherboard backlight circuit.
A Blown Backlight Fuse Can Produce a Permanently Dark Screen
Many laptop motherboards contain a small fuse in the circuit that supplies power to the display backlight. The fuse may open after a shorted panel, damaged cable, incorrect connection, or display work performed while power was still connected.
When this occurs, replacing the screen alone may not restore illumination. The faint image can remain because the image signal continues reaching the panel while backlight voltage is absent.
- The backlight may stop immediately after screen service.
- A replacement panel may produce the same dark result.
- The fuse may show no obvious visual damage.
- Electrical testing is required to confirm continuity and voltage.
- The original short must be corrected before the circuit is restored.
Bypassing a failed fuse without identifying the cause removes an important protection device and can produce greater motherboard damage.
Brightness Controls Cannot Repair Missing Backlight Power
A screen can appear dark because brightness was reduced through keyboard controls, Windows settings, power-saving software, or manufacturer utilities. These possibilities should be checked before disassembly.
However, software brightness adjustment cannot restore a backlight that has lost electrical power or contains failed LEDs.
- Press the appropriate brightness-up key several times.
- Check Windows display brightness when visible externally.
- Disconnect unusual docking stations or display accessories.
- Restart the graphics driver or operating system when appropriate.
- Compare behavior before and after Windows begins loading.
If the internal screen is already dark at the manufacturer logo or firmware screen, the problem is unlikely to be caused only by a Windows brightness setting.
A Screen That Lights Briefly Provides a Useful Diagnostic Detail
Some laptops illuminate the screen for less than a second and then turn the backlight off. This can occur when the backlight circuit detects abnormal current, a failing LED strip cannot remain powered, or a cable connection becomes unstable as voltage is applied.
The exact timing should be observed during a cold start, restart, and lid movement.
- Watch whether the startup logo appears at full brightness.
- Note how long the illumination remains active.
- Check whether the faint image continues afterward.
- Observe whether moving the lid restores the light temporarily.
- Compare the result with an external monitor.
This pattern can narrow the problem to the display and backlight path, but electrical measurements or compatible substitution testing may still be required to identify the failed component.
Backlight Failure After Screen Replacement Requires Careful Rechecking
A laptop that had a visible image before screen replacement but loses illumination immediately afterward should be inspected for installation-related problems before another panel is ordered. The replacement screen may be incompatible, the cable may not be seated correctly, or the backlight circuit may have been damaged while power remained connected.
Screen connectors can carry power even when the laptop appears shut down. An internal battery that was not disconnected may keep part of the display circuit energized during service.
- Confirm that the replacement panel matches the original electrical specifications.
- Check that the display connector was inserted evenly and fully.
- Inspect for bent contacts, torn tape, or cable damage.
- Verify that the internal battery was disconnected during installation.
- Test whether the original panel now produces the same dark-screen symptom.
If both the original and replacement panels remain dark after service, the motherboard backlight circuit or display cable may have been affected.
Panel Compatibility Includes More Than Screen Size and Resolution
Two laptop screens can have the same diagonal size and resolution while using different connectors, voltage requirements, backlight control methods, mounting positions, refresh rates, or pin assignments. A panel that physically fits may still be electrically unsuitable.
| Compatibility Detail | Why It Matters |
|---|---|
| Connector type and pin count | Determines physical and electrical connection |
| Connector location | Affects cable reach and routing |
| Backlight voltage | Incorrect requirements can prevent illumination |
| Resolution and signal type | Must match the laptop’s display output |
| Refresh rate | May require a compatible cable and graphics configuration |
| Touch capability | Can require additional connections and assembly parts |
The exact panel model should be compared with the laptop’s original part, service documentation, or a verified compatible replacement list.
Higher-Refresh Displays May Require a Different Cable
Gaming and performance laptops may be offered with several display options, such as standard 60 Hz panels and higher-refresh 120 Hz, 144 Hz, or faster screens. These configurations may use different cable assemblies even when the panels appear similar.
Installing a higher-refresh panel with a cable designed for a lower-bandwidth display can produce no image, unstable operation, reduced refresh options, or backlight problems.
- Identify the original panel resolution and refresh rate.
- Confirm the number of display signal lanes supported by the cable.
- Compare the motherboard connector and part number.
- Verify that firmware and graphics hardware support the panel.
- Test the screen at its intended settings after installation.
A display upgrade should be treated as an electrical and signal-compatibility change rather than a simple size-for-size replacement.
Touchscreen Assemblies Add More Connections and Failure Points
A touchscreen laptop may contain a separate LCD panel, touch digitizer, glass layer, webcam cable, antenna routing, and sensor connections within the lid. The screen can lose illumination while touch input continues to work, or the display may function while touch stops responding.
Because the layers may be bonded together, replacing only the LCD can be difficult or impractical on some models.
| Observed Behavior | Possible Direction |
|---|---|
| Touch works but image is very dark | Backlight or LCD power problem |
| Image is normal but touch fails | Digitizer, touch cable, or driver issue |
| Both image and touch fail after impact | Assembly or multiple connections may be damaged |
| Backlight changes when lid moves | Display cable or hinge-area damage |
| Cracked glass with normal image | Outer touch layer may be damaged while LCD still works |
The complete display assembly should be identified before ordering parts because non-touch and touch versions of the same laptop model may not be interchangeable.
Hinge Damage Can Pull or Crush the Display Cable
A loose, stiff, or separated hinge can place unusual pressure on the display cable. The cable may be pinched between plastic parts, pulled from its connector, or repeatedly bent beyond its intended path.
- The screen brightness changes as the lid moves.
- The display becomes dark near a specific opening angle.
- Flickering appears when the hinge area is touched.
- The bezel separates or makes cracking sounds.
- The cable insulation shows flattening or abrasion.
Replacing the cable without correcting the damaged hinge or broken mounting points can cause the new cable to fail again.
Webcam and Wireless Cables Can Be Mistaken for the Display Cable
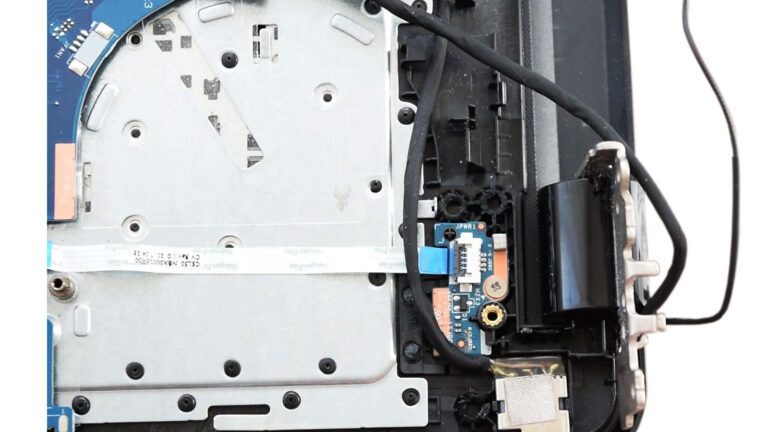
Several thin cables may pass through the laptop hinge area. Wireless antenna leads often travel into the lid, and a webcam or microphone cable may run near the display connection. These cables serve different functions and should not be pulled or repositioned unnecessarily during diagnosis.
The main display cable is usually wider and connects directly to the motherboard and LCD panel, but its appearance varies by model.
- Trace each cable before disconnecting it.
- Photograph the original routing when needed.
- Avoid placing antenna wires beneath hinge brackets.
- Keep adhesive and shielding in their intended positions.
- Confirm that no cable is trapped before tightening the hinge.
Incorrect cable routing can create new wireless, camera, microphone, or display problems after the laptop is reassembled.
Ambient Light Sensors Can Reduce Brightness Unexpectedly
Some laptops use an ambient light sensor to adjust screen brightness automatically. A blocked sensor, incorrect reading, driver issue, or manufacturer utility can reduce brightness more than expected.
This usually does not create the same complete darkness as a failed backlight, but it should be considered when the screen remains visible and responds to software or environmental changes.
- Check whether automatic brightness is enabled.
- Locate and clean the sensor area gently.
- Compare brightness in different lighting conditions.
- Review power and display settings.
- Test before Windows loads to separate software from hardware behavior.
If the screen is dark at the firmware logo and a faint image appears only with a flashlight, an ambient light setting is unlikely to be the main cause.
Power-Saving Features Can Dim the Screen Without Hardware Failure
Battery saver, adaptive brightness, manufacturer power utilities, and graphics settings can lower screen brightness when the laptop is unplugged or operating under a selected power plan.
| Condition | Possible Brightness Change |
|---|---|
| Charger disconnected | Battery power plan may reduce brightness |
| Battery saver enabled | Display may dim automatically |
| Idle timeout reached | Screen may dim before turning off |
| Graphics power-saving mode | Content-dependent brightness may change |
| Manufacturer utility active | Custom display rules may override Windows settings |
Software dimming usually leaves the image clearly visible in a dark room and responds to brightness controls. A failed backlight typically does not.
Sleep and Wake Problems Can Leave the Backlight Off Temporarily
A laptop may wake from sleep with the operating system running while the internal display remains dark. The backlight or graphics driver may fail to resume correctly even though the hardware is not permanently damaged.
- Try the brightness controls after waking the laptop.
- Use the Windows graphics reset shortcut when appropriate.
- Close and reopen the lid once without forcing the hinge.
- Test whether an external monitor shows the active desktop.
- Perform a complete shutdown instead of another sleep cycle.
If a full shutdown restores normal illumination consistently, the problem may involve power management, firmware, or display-driver behavior. If the backlight remains absent from the first startup logo, hardware diagnosis becomes more likely.
Graphics Driver Problems Can Affect Brightness Control
The graphics driver communicates with Windows power settings, brightness controls, and display detection. An incorrect or damaged driver may remove the brightness slider, prevent keyboard adjustments, or cause the screen to remain at an unintended level.
Driver failure usually does not remove the backlight during the earliest startup stages. Comparing the screen before and after Windows loads helps distinguish a driver issue from an electrical backlight failure.
- Observe brightness at the manufacturer logo.
- Check whether the display changes when Windows begins loading.
- Test the brightness keys and Windows slider.
- Review the graphics and monitor entries in Device Manager.
- Install the correct manufacturer-supported driver when needed.
Generic drivers may produce basic video while leaving model-specific brightness controls unavailable.
Motherboard Backlight Circuits Can Fail Without Affecting External Video
The motherboard supplies and controls power for the internal display. A failed fuse, switching component, damaged connector, shorted capacitor, or missing enable signal can leave the internal backlight off while external video continues working normally.
| Electrical Test Area | What It Helps Determine |
|---|---|
| Backlight fuse continuity | Whether the protected power path is open |
| Panel supply voltage | Whether basic display power reaches the connector |
| Backlight output voltage | Whether illumination power is being generated |
| Enable signal | Whether the motherboard is requesting the backlight to turn on |
| Brightness control signal | Whether dimming commands are present |
These measurements require the correct board information, safe probing methods, and an understanding of the connector pinout. Accidental contact between powered pins can cause additional damage.
A Shorted Panel or Cable Can Damage a Repaired Circuit Again
Replacing a blown fuse without testing the connected panel and cable can lead to another immediate failure. The fuse may have opened because a damaged conductor or screen created excessive current.
A protective component should not be restored until the reason it failed has been investigated.
- Inspect the cable for pinched or exposed conductors.
- Check the panel connector for burned or bent contacts.
- Look for liquid residue around the motherboard connector.
- Test with a verified compatible panel when appropriate.
- Confirm that current draw and voltages remain normal after repair.
A board-level repair is incomplete when the original source of the electrical fault remains connected.
Liquid Damage Near the Display Connector Can Affect Illumination
Liquid entering through the keyboard, hinge, or screen bezel can reach the display connector or backlight circuitry. Corrosion may weaken the connection gradually, causing flickering, uneven brightness, or complete backlight loss days or weeks after the exposure.
Residue may be hidden beneath the connector or nearby components and may not be visible during a quick inspection.
- Disconnect the charger and battery.
- Inspect both sides of the motherboard near the display connector.
- Check the cable and panel connection for residue.
- Clean contamination using an appropriate repair process.
- Test the circuit before reconnecting questionable parts.
Repeatedly powering a liquid-damaged laptop can expand corrosion or create a short in a circuit that was previously only unstable.
Compatible Substitution Testing Can Separate the Panel From the Laptop
A known-working compatible panel can help determine whether the original screen contains the fault. The test panel must match the connector, voltage, signal type, resolution requirements, and other relevant specifications.
- If the test panel lights normally, the original panel is likely defective.
- If both panels remain dark, the cable or motherboard requires further testing.
- If the test panel flickers with lid movement, the cable path should be inspected.
- If only one panel works intermittently, compatibility must be rechecked.
- If the backlight fuse opens again, a short may still be present.
Substitution testing is most useful when the replacement part is verified rather than selected only because its connector appears to fit.
A Dark Screen After Impact May Involve More Than the Backlight
A laptop that loses screen illumination after being dropped, struck, or closed on an object may have damage in several parts of the display assembly. The LCD may still form a faint image while the backlight circuit, cable, connector, or panel structure has been affected.
Impact can also loosen the motherboard-side display connector or damage the hinge mounts that protect the cable route. A quick screen replacement may not correct the problem when the lid or chassis remains distorted.
- Inspect the lid for twisting, dents, and separated edges.
- Check whether the hinge moves smoothly and evenly.
- Look for cracks beneath the bezel or around the panel mounts.
- Observe whether screen brightness changes as the lid moves.
- Confirm that the cable is not being pulled by damaged hinge hardware.
Structural damage should be corrected before a replacement display cable or panel is installed, or the new part may be placed under the same stress.
Uneven Illumination Can Appear Before Complete Backlight Failure
A backlight problem does not always begin with a completely black screen. One side of the display may appear darker, bright spots may develop near the edges, or the illumination may pulse at low brightness levels.
| Illumination Pattern | Possible Direction |
|---|---|
| One side of the screen is darker | Part of the LED backlight may be failing |
| Brightness pulses or flickers | Backlight power or panel circuitry may be unstable |
| Bright spots near the edges | Internal diffuser layers or panel pressure may be involved |
| Backlight works only at high brightness | LED or control-circuit weakness may be developing |
| Darkness spreads over time | Panel or internal backlight damage may be progressing |
Photographing the symptom against a plain background can help document whether the dark area remains fixed or changes with movement and temperature.
Temperature Can Change an Intermittent Backlight Problem
Some failing panels or motherboard components behave differently when cold or warm. A screen may illuminate during the first startup of the day and become dark after several minutes, or it may remain dark until the laptop warms slightly.
- Observe the display during a cold startup.
- Record how long the backlight remains active.
- Check whether the symptom changes as the laptop warms.
- Allow the computer to cool before repeating the test.
- Compare internal-screen behavior with the external display.
A temperature-related pattern can support an intermittent electrical diagnosis, but heat should not be applied directly to the panel or motherboard as an informal repair attempt.
Display Connectors Must Be Examined for Bent or Burned Contacts
The small contacts inside a laptop display connector can be bent, recessed, contaminated, or burned. A connector may appear attached while one backlight-power contact is not making a reliable connection.
Damage may be found at the motherboard, cable, or panel side. Magnification is often required because the contacts are closely spaced and difficult to inspect with the unaided eye.
- Look for darkened plastic or electrical discoloration.
- Check whether the connector sits level in its socket.
- Inspect the cable end for folded or damaged contacts.
- Confirm that locking tape and brackets are positioned correctly.
- Do not force a connector that does not align naturally.
A burned motherboard connector may require board-level repair rather than another cable or screen replacement.
Replacement Parts Should Be Tested Before Full Reassembly
After a compatible panel or display cable is installed, the laptop should be tested before the bezel, hinge covers, and lower case are fully secured. This makes it easier to correct a loose connection without repeatedly disassembling the computer.
- Reconnect the battery only after all display connections are secure.
- Start the laptop with the panel supported safely.
- Check brightness at the startup logo and inside Windows.
- Move the lid slowly through its normal range.
- Confirm that the cable remains clear of hinge movement.
- Shut the laptop down before completing reassembly.
The exposed panel and internal components should not be left unsupported or allowed to contact conductive surfaces during testing.
Repeatedly Opening and Closing the Lid Is Not a Permanent Repair
A screen that lights after the lid is moved may encourage continued use at one particular angle. This can temporarily restore contact in a damaged cable, but repeated movement may enlarge the break or damage the connector further.
A lid position that restores the screen identifies an intermittent connection; it does not correct it.
The laptop should be handled carefully until the cable, hinge path, and connectors are inspected. Forcing a stiff hinge can also crack the lid or separate the mounting points from the case.
An External Monitor Can Provide Temporary Access to Important Files
When the internal backlight has failed but the computer otherwise operates normally, an external monitor may provide temporary access for copying files, reviewing settings, or preparing for repair.
- Use a known-working external display and cable.
- Verify that the laptop is connected to power during large file transfers.
- Back up important data before extensive hardware testing.
- Avoid repeatedly moving a damaged lid while the files are being copied.
- Do not assume the internal storage is protected by the external display test.
An external monitor is a useful temporary solution, but it does not correct the failed internal display or prevent the problem from becoming worse.
OLED Displays Require a Different Interpretation
An OLED laptop display does not use a conventional LED backlight. Each pixel produces its own light. A faint image visible only under a flashlight therefore does not point to a separate backlight assembly in the same way it does with a typical LCD panel.
| Display Type | Dark-Screen Interpretation |
|---|---|
| LED-backlit LCD | A faint image may indicate missing backlight illumination |
| Older fluorescent LCD | Lamp or inverter failure may be involved |
| OLED display | Panel power, signal, or pixel-emission failure must be considered |
| Mini-LED LCD | Backlight zones and control circuitry may create unusual dark areas |
The panel model and laptop specifications should be confirmed before applying a conventional LCD backlight diagnosis.
Repair Cost Depends on Which Part Has Actually Failed
A basic non-touch LCD panel may be straightforward to replace, while a bonded touchscreen assembly, high-refresh gaming display, OLED panel, damaged cable route, or motherboard backlight circuit can require substantially different work.
Ordering a panel before confirming the cause can increase cost when the actual failure is a cable, fuse, connector, or motherboard component.
- Panel-only replacement may be appropriate when the backlight inside the LCD has failed.
- Cable replacement may be required when brightness changes with lid movement.
- Hinge and case repair may be necessary before installing display parts.
- Board-level repair may be needed when backlight voltage is missing.
- A complete lid assembly may be more practical on bonded or heavily damaged designs.
A complete diagnosis allows the repair estimate to reflect the actual failed section rather than the most visible symptom.
Safe Handling Reduces the Risk of Additional Display Damage
Laptop display components are thin, fragile, and connected to powered motherboard circuits. Improper handling can crack the panel, damage the cable, short adjacent contacts, or open the backlight fuse.
- Shut the computer down completely.
- Disconnect the charger.
- Disconnect or electrically isolate the internal battery.
- Use appropriate tools to remove the bezel and covers.
- Support the panel without bending or twisting it.
- Reconnect power only after every display connection is secure.
The power button should not be pressed while a display connector is partially inserted or resting loosely near the motherboard socket.
Final Testing Should Cover Brightness, Movement, and Power States
A repaired laptop should be tested through more than one normal startup. The backlight must remain stable at different brightness levels, lid positions, and power conditions.
| Final Test | Expected Result |
|---|---|
| Cold startup | Backlight appears consistently from the startup logo |
| Brightness adjustment | Illumination changes smoothly without flickering |
| Lid movement | Image and brightness remain stable through normal angles |
| Battery and charger operation | Backlight works under both power sources |
| Sleep and wake | Display illumination returns reliably |
| Extended operation | No darkening occurs as the laptop warms |
Testing should also confirm that the webcam, wireless antennas, microphone, touch input, and lid sensor still function when those components share the repaired display assembly.
A Faint Image Narrows the Problem but Does Not Identify the Failed Part
A laptop screen that becomes visible only under a bright light is usually still receiving image information. The missing illumination may be caused by failed LEDs inside the panel, a damaged display cable, a loose connector, an open motherboard fuse, a control-circuit failure, or an incompatible replacement screen.
The most reliable diagnosis compares internal and external video, checks behavior before Windows loads, observes lid movement, confirms panel compatibility, and tests the backlight power path when necessary. Replacing the LCD without these checks can leave the original problem unchanged.
Once the correct fault is repaired, the screen should illuminate consistently from startup, respond normally to brightness controls, remain stable as the lid moves, and return properly after sleep. These results confirm that the display is not merely producing an image, but is receiving reliable illumination throughout normal laptop use.