A Brief Movement From the Fans Does Not Confirm That the Computer Has Started
A desktop computer may appear to receive power when its fans move for a fraction of a second after the power button is pressed. Lights may flash, the processor fan may begin turning, and the case fans may respond before everything stops again. The computer never reaches the manufacturer logo, displays no picture, and may repeat the same behavior with every startup attempt.
This symptom shows that some electrical activity is reaching the system, but it does not prove that the power supply, motherboard, processor, or connected hardware is operating correctly. Modern computers follow a controlled startup sequence. If an important voltage is missing, a connection is incorrect, or protection circuitry detects an unsafe condition, the sequence can stop almost immediately.
The duration of the fan movement can vary. Some computers shut down in less than a second, while others remain powered for several seconds before stopping. A system may also attempt to restart automatically, creating a repeating cycle of fan movement and shutdown.
The Power Supply Must Produce Several Stable Voltages
A desktop power supply does more than send one source of power to the computer. It provides several regulated voltage rails used by the motherboard, processor, storage devices, graphics card, fans, and other components.
When the power button is pressed, the motherboard requests full operation from the power supply. The power supply must then stabilize its outputs and report that they are ready. If this confirmation does not arrive correctly, the motherboard may stop the startup process.
| Power Condition | Possible Startup Result |
|---|---|
| Normal standby power | Motherboard lights may appear before startup |
| Main outputs fail to stabilize | Fans may move briefly and stop |
| Voltage drops under load | The computer may shut down after several seconds |
| Protection circuit activates | Power may be interrupted immediately |
| Power supply does not respond | No fan movement or visible activity occurs |
A power supply can therefore operate partially. Standby lights or brief fan movement do not confirm that it can support the full electrical load required during startup.
The Processor Power Connector Is Separate From the Main Motherboard Connector
Most desktop motherboards use a large 24-pin power connector along with a separate processor power connector near the top of the board. The processor connector commonly uses four, eight, or more pins depending on the system.
If the main connector is installed but the processor power cable is missing, loose, or connected incorrectly, fans and lights may still respond. The processor cannot begin normal operation, so the system may remain blank or shut down quickly.
- Confirm that the main motherboard connector is fully seated.
- Check the processor power connector near the CPU socket.
- Verify that the cable is labeled for CPU or EPS use.
- Do not substitute a graphics-card power cable with a similar appearance.
- Inspect modular power-supply connections at both ends.
Some connectors require significant pressure before the retaining clip locks into place. A plug that looks aligned may still be partially disconnected.
An Electrical Short Can Trigger Immediate Protection
The power supply and motherboard include protective behavior intended to reduce damage when excessive current or an electrical short is detected. A misplaced screw, incorrect motherboard standoff, damaged cable, or failed component can cause power to stop almost as soon as startup begins.
This is especially important after a computer has been assembled, upgraded, transported, or opened for service.
- Disconnect the computer from wall power.
- Inspect for loose screws beneath or around the motherboard.
- Confirm that motherboard standoffs align only with mounting holes.
- Check cables for crushed insulation or exposed conductors.
- Inspect newly installed expansion cards and storage devices.
- Reconnect only the minimum hardware needed for testing.
Repeatedly pressing the power button without locating the short is not a useful test. The protective shutdown is a symptom that requires physical inspection.
Incorrect Motherboard Standoffs Can Contact the Back of the Board
Metal standoffs hold the motherboard above the computer case. Each standoff should correspond to a mounting hole in the board. An extra standoff placed where no mounting hole exists can touch solder points or electrical traces on the underside.
The resulting short may prevent startup completely or produce brief fan movement followed by shutdown. The problem may begin after a motherboard replacement or case transfer even when every visible cable appears correct.
A motherboard should never rest directly against the case or against a metal standoff that does not align with a mounting hole.
Testing the motherboard outside the case can help identify a mounting-related short, but the board must be placed on a safe, nonconductive surface and handled carefully.
The CPU Cooler and Processor Installation Can Affect the Startup Sequence
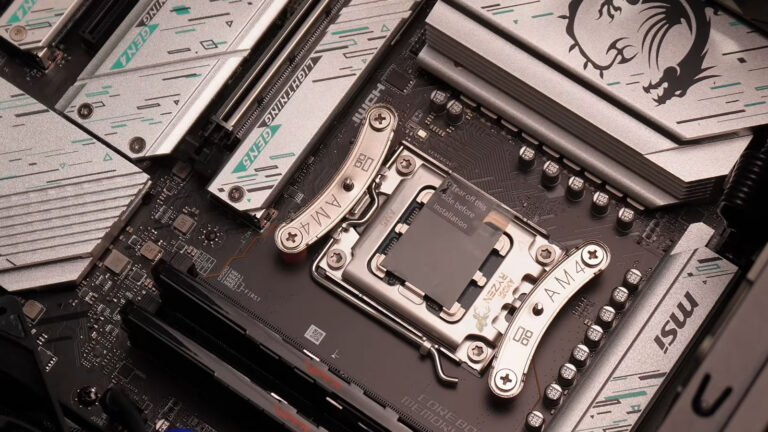
A processor that is installed incorrectly may prevent the motherboard from completing its first hardware checks. Bent socket contacts, contamination, incorrect orientation, or excessive mounting pressure can interfere with processor communication or memory channels.
The cooling assembly can also create problems when it is installed unevenly. Some motherboards flex when a cooler is overtightened, particularly around the processor socket and memory slots.
| Processor Area Problem | Possible Behavior |
|---|---|
| CPU not seated correctly | No successful startup or diagnostic display |
| Bent socket contact | Memory, processor, or PCI Express detection may fail |
| Cooler mounted unevenly | Board flex or poor socket contact may occur |
| CPU fan not connected to expected header | Some systems may display an error or stop startup |
| Thermal protection activates | The system may shut down after temperature rises |
An immediate shutdown normally occurs too quickly for ordinary processor overheating to develop from a cold start. However, a missing cooler or badly installed cooling assembly can cause rapid temperature rise if the computer remains on for several seconds.
Memory Problems Can Prevent Startup Without Causing Immediate Power Loss
Loose or incompatible memory often prevents the computer from completing its power-on self-test. The system may remain powered with no display, restart repeatedly, or stop after a short attempt to initialize the memory.
Because motherboard behavior varies, memory should still be checked when the fans stop or restart during the early startup sequence.
- Reseat the memory modules with power disconnected.
- Confirm that both retaining clips are fully locked.
- Test one compatible module at a time.
- Use the motherboard’s recommended slot for single-module testing.
- Remove recently added memory and restore the previous configuration.
A memory module can appear inserted while one end remains slightly raised. Visual inspection and firm, even installation are necessary.
A Graphics Card Can Add a Load the Power Supply Cannot Support
A graphics card may require one or more dedicated power connectors in addition to the power received through the motherboard slot. Missing connectors, damaged adapters, or an overloaded power supply can interrupt startup.
The problem may begin after a graphics-card upgrade even when the previous card worked normally. A newer card can demand more current during initialization than the old configuration required.
- Confirm that all required graphics power connectors are installed.
- Use cables approved for the specific power supply.
- Avoid mixing modular cables from different power-supply models.
- Reseat the graphics card in the expansion slot.
- Test integrated graphics when the processor and motherboard support it.
Modular power-supply cables are not universally interchangeable. Connectors may fit physically while using a different wiring arrangement that can damage hardware.
Recently Added Hardware Should Be Disconnected During Minimum-Configuration Testing
A failed storage device, USB accessory, expansion card, fan controller, or lighting component can interfere with startup. Troubleshooting is easier when unnecessary hardware is removed from the initial test.
A basic test configuration commonly includes the motherboard, processor, cooler, one memory module, power supply, and a display connection when available.
| Hardware Removed for Testing | Reason |
|---|---|
| Storage drives | The system can normally reach firmware without them |
| USB devices | A damaged peripheral or port may create a fault |
| Additional memory | Reduces variables during memory initialization |
| Expansion cards | Removes added electrical load and slot-related problems |
| Case accessories | Eliminates fan hubs, lighting controllers, and front-panel devices |
Components should be added back one at a time after the system remains powered and begins normal startup. This makes it easier to identify which connection or device causes the shutdown to return.
Motherboard Diagnostic Indicators Can Narrow the Failure Stage
Some motherboards include diagnostic lights, two-digit displays, or audible beep codes that identify the stage reached before startup stops. Labels may refer to the processor, memory, graphics, or boot device.
- A CPU indicator can direct attention to processor power, socket contact, or firmware support.
- A memory indicator can suggest module seating, compatibility, or memory-channel problems.
- A graphics indicator can identify card, slot, display, or graphics-power concerns.
- A boot indicator usually appears later, after core hardware initializes successfully.
An indicator that flashes only briefly may be part of the normal startup sequence. The important detail is which light remains active or which code appears when the system stops progressing.
The Power Button and Front-Panel Wiring Can Also Create Confusing Symptoms
The case power button connects to small motherboard header pins. Incorrect placement, damaged wiring, or a stuck switch can cause irregular startup and shutdown behavior.
A power switch that remains electrically closed may be interpreted as the button being held down. Many systems respond to a long press by forcing power off after several seconds.
- Verify the front-panel connector positions in the motherboard manual.
- Inspect the power-switch cable for damage.
- Check whether the physical button is jammed.
- Disconnect unnecessary reset-switch wiring during testing.
- Briefly test the correct power-switch pins using an appropriate method.
Front-panel pins are small and easy to misidentify. Randomly shorting motherboard headers can damage the board and should be avoided.
The Power Supply Should Be Tested Under a Realistic Load
A power supply can appear functional when tested without the computer and still fail during startup. Fans may spin, standby lights may remain on, and a basic tester may show acceptable voltage while the unit collapses as soon as the processor or graphics card begins drawing power.
The most useful comparison is often a known-good power supply with suitable wattage, correct connectors, and compatible modular cables. A replacement should never be connected with cables from the original unit unless the manufacturer specifically confirms compatibility.
| Test Method | Limitation |
|---|---|
| Fan movement | Shows only that some power is present |
| Paper-clip startup test | Does not confirm stable operation under load |
| Basic power-supply tester | May not reproduce startup demand |
| Voltage measurement | Requires correct procedure and safe handling |
| Known-good replacement | Provides a stronger comparison when properly matched |
A failed power supply remains one possible cause, but replacing it should follow evidence rather than the assumption that brief fan movement always means the unit is defective.
The Motherboard May Be Interrupting Power Intentionally
The motherboard controls much of the startup sequence and can stop the system when required conditions are not met. Damaged voltage-regulation components, failed capacitors, corrupted firmware, socket problems, or internal board faults may prevent stable startup.
Visible damage is not always present. A motherboard can look normal while failing to initialize the processor or maintain the signals required to keep the power supply active.
- Inspect for burned areas or cracked components.
- Check for corrosion or liquid residue.
- Look for damaged USB ports with bent contacts.
- Review diagnostic lights and codes.
- Test with minimum hardware and a known-good power supply.
A motherboard diagnosis is stronger when other major components have been tested rather than replaced one after another without comparison.
Damaged USB Ports Can Create a Short During Startup
A bent metal contact inside a USB port can touch the port housing or another contact. The resulting short may prevent startup or cause the power supply to shut down immediately.
Front-panel USB ports are especially important after a case impact, cable pull, or incorrect internal connection.
- Disconnect all external USB devices.
- Inspect rear and front ports with the computer unplugged.
- Disconnect front-panel USB headers from the motherboard.
- Retest the system in a minimum configuration.
- Reconnect only undamaged ports after startup is restored.
A damaged port should not be tested repeatedly by inserting devices. Bent contacts can damage both the motherboard and the connected accessory.
Case Fans Can Stop Even When the Computer Remains Powered
Not every fan that stops indicates a failed startup. Some motherboards and fan controllers use zero-RPM behavior at low temperature. A case or graphics-card fan may spin briefly during initialization and then stop by design.
The distinction is whether the rest of the computer continues operating. If motherboard lights remain on, diagnostic indicators progress, and the system displays an image, the fan behavior may be normal.
| Observed Condition | Likely Meaning |
|---|---|
| One case fan stops but system starts | Fan curve or controller behavior may be normal |
| Graphics fans stop after initial spin | Zero-RPM mode may be active |
| All lights and fans stop together | The entire startup sequence has been interrupted |
| CPU fan stops while system remains on | Fan connection or control should be checked immediately |
| Fans repeatedly start and stop | The computer may be cycling through failed startup attempts |
The system’s full behavior should be observed rather than judging the condition from one fan alone.
A Repeating Power Cycle Can Indicate Failed Hardware Training
Some motherboards restart several times while training memory or applying new firmware settings. This can be normal after a hardware change, firmware update, or complete loss of stored configuration.
However, a system that continues cycling without ever reaching a display may be unable to complete processor, memory, or graphics initialization.
- Allow reasonable time after a major memory or firmware change.
- Check whether diagnostic lights move through different stages.
- Restore supported memory settings.
- Test one memory module in the recommended slot.
- Clear stored firmware settings when appropriate.
Power should not be interrupted repeatedly during legitimate memory training. At the same time, endless cycling requires diagnosis rather than being left to continue indefinitely.
Clearing Firmware Settings Can Restore a Failed Configuration
Incorrect memory timing, unsupported overclocking, voltage changes, or a corrupted stored setting can prevent startup. Clearing the motherboard’s firmware settings returns many options to their defaults.
The exact procedure depends on the motherboard. It may involve a clear-CMOS button, dedicated header pins, or temporary removal of the coin-cell battery while the computer is disconnected from power.
- Disconnect wall power and switch off the power supply.
- Follow the motherboard manufacturer’s reset procedure.
- Allow stored electrical charge to dissipate.
- Restore power and test with minimum hardware.
- Reconfigure only necessary settings after successful startup.
Clearing settings may reset boot order, memory profiles, fan controls, and other customized options. Existing values should be documented when possible.
Firmware Compatibility Can Prevent a New Processor From Starting
A motherboard may physically accept a processor but require a newer firmware version before it can initialize that model. In this situation, fans and lights may respond while the system never completes startup.
The issue often appears after a processor upgrade or when older motherboard inventory is paired with a later processor generation.
| Compatibility Check | Purpose |
|---|---|
| Motherboard CPU support list | Confirms whether the processor is supported |
| Required firmware version | Shows when support was added |
| Installed board revision | Identifies possible hardware differences |
| Firmware update method | Determines whether a working processor is required |
| Memory support information | Helps avoid a second compatibility problem |
Some boards support firmware updates without a functioning processor, while others require compatible hardware to complete the update.
Modular Power Cables Must Match the Exact Power Supply
The component-side connectors on modular power cables can look standardized, but the power-supply-side wiring may differ between manufacturers and even between models from the same brand.
Using an incompatible cable can send voltage to the wrong pins, causing immediate shutdown or permanent damage to storage devices, graphics cards, and the motherboard.
A modular cable should be treated as part of its original power supply, not as a universal computer cable.
When the cable history is uncertain, the safest approach is to use only the verified cable set supplied for that exact unit.
Testing Outside the Case Can Isolate Mounting Problems
If minimum-configuration testing inside the case still produces immediate shutdown, the motherboard may be tested outside the chassis to eliminate standoff, screw, and case-wiring concerns.
The board should be placed on a firm nonconductive surface such as its plain cardboard box. Conductive anti-static bags should not be used as the operating surface.
- Install only the processor, cooler, one memory module, and required display hardware.
- Connect the main motherboard and processor power cables.
- Keep the board away from loose screws and metal tools.
- Start it only through the correct power-switch pins or onboard button.
- Observe diagnostic indicators before adding hardware.
If the system remains powered outside the case but fails after reinstallation, the mounting hardware or case connections should be reviewed carefully.
A Known-Good Part Must Be Truly Compatible
Substitution testing is useful only when the replacement component is known to work and matches the system’s requirements. An incompatible memory module, undersized power supply, or unsupported processor can create a second failure and confuse the diagnosis.
- Verify connector and wattage requirements.
- Confirm memory type and supported capacity.
- Check processor and motherboard compatibility.
- Use a graphics card that the test power supply can support.
- Change one component at a time.
Replacing several parts simultaneously may restore operation, but it prevents clear identification of the original fault.
The Order of Testing Reduces Unnecessary Part Replacement
A structured process begins with external power, visible damage, recent changes, and cable connections before moving to major component replacement.
- Disconnect external accessories and inspect all ports.
- Verify motherboard and processor power connections.
- Remove recently added hardware.
- Test one memory module in the recommended slot.
- Clear firmware settings when appropriate.
- Use minimum hardware and review diagnostic indicators.
- Compare with a known-good compatible power supply.
- Evaluate the motherboard, processor, and socket after simpler causes are excluded.
This order does not guarantee that the least expensive part is always responsible, but it reduces the chance of replacing working hardware while overlooking a loose cable or shorted accessory.
Recent Hardware Changes Provide an Important Starting Point
A computer that began shutting down immediately after a repair, upgrade, cleaning, or move should first be compared with its previous configuration. The timing can help identify a loose connector, incompatible component, trapped cable, or mounting problem introduced during the work.
- Review every component that was removed or replaced.
- Check cables near the area where work was performed.
- Restore the last known working configuration when practical.
- Inspect for screws or tools left inside the case.
- Confirm that switches and connectors were not moved accidentally.
Returning the computer to its earlier configuration can be more useful than immediately replacing another part.
Transport Can Loosen Heavy Components
A desktop computer may develop this symptom after being transported even when no upgrade was performed. Large graphics cards, heavy processor coolers, memory modules, and power connectors can shift when the case is moved or placed on its side.
| Transport-Related Condition | Possible Effect |
|---|---|
| Graphics card partially unseated | Startup may stop during graphics initialization |
| Memory module shifted | Hardware training may fail |
| Processor cooler moved | Socket pressure or fan connection may change |
| Power connector loosened | Voltage may be interrupted under load |
| Loose screw inside case | An electrical short may activate protection |
Components should be inspected and reseated with the computer disconnected from power. Heavy parts should also be supported properly before the system is transported again.
Repeated Startup Attempts Can Hide the Original Pattern
Pressing the power button many times can produce slightly different behavior as capacitors discharge, temperatures change, or protection circuits reset. One attempt may cause a brief fan movement while another appears completely unresponsive.
The initial symptom should be documented before extensive testing begins.
- Observe how long the fans remain active.
- Note whether lights remain on after the fans stop.
- Record any diagnostic code or beep.
- Check whether the system restarts automatically.
- Disconnect wall power before changing internal hardware.
Consistent observations make it easier to determine whether the computer is losing all power or simply failing to complete hardware initialization.
A Failed Fan Is Different From a Failed Startup
One fan may stop because its bearings, cable, header, or controller has failed while the computer continues running. This is different from a condition in which every fan, light, and connected device loses power together.
- Check whether the display reaches the firmware or operating system.
- Listen for storage and system activity after the fan stops.
- Observe motherboard and case lighting.
- Compare the affected fan with other connected fans.
- Verify whether the fan restarts as temperature rises.
A failed processor fan should be corrected promptly even when the computer starts, because continued operation without suitable cooling can lead to overheating and shutdown.
Power-Supply Capacity and Quality Both Matter
A power supply may have a wattage label that appears sufficient while still being unsuitable for the hardware. Age, internal wear, rail design, connector availability, and transient load handling all affect whether it can support startup reliably.
| Power-Supply Concern | Possible Result |
|---|---|
| Insufficient capacity | Shutdown when major components initialize |
| Aging internal components | Voltage becomes unstable under load |
| Missing required connector | Processor or graphics hardware cannot start correctly |
| Improper adapter use | Connections may overheat or deliver inadequate current |
| Low-quality replacement | The original symptom may remain or new instability may appear |
A correctly selected replacement should meet the system’s electrical and connector requirements rather than being chosen only by the wattage printed on the label.
Liquid Residue and Corrosion Can Interrupt the Power Sequence
Liquid exposure may leave conductive residue around ports, power circuits, expansion slots, or front-panel connections. The computer may initially continue working and later begin shutting down as corrosion develops.
Visible residue, discoloration, or a history of liquid exposure should change the troubleshooting approach. Applying power repeatedly can increase damage when conductive contamination remains present.
A computer with suspected liquid damage should be inspected before repeated startup testing continues.
Cleaning and board-level evaluation may be required before the power supply or motherboard can be judged accurately.
Burned Connectors Require Immediate Attention
Darkened plastic, melted insulation, a sharp electrical odor, or heat damage around a power connector can indicate excessive resistance or an overloaded connection. The computer should remain disconnected until the damaged area is evaluated.
- Inspect the main motherboard power connector.
- Check the processor and graphics-card power connections.
- Look for melted SATA power plugs and adapters.
- Examine modular connectors at the power supply.
- Do not reuse visibly damaged cables or sockets.
Replacing only the cable may not be sufficient when heat has damaged the motherboard, graphics card, storage device, or power-supply connector.
Intermittent Startup Can Point to a Marginal Connection
A computer may occasionally start normally after several failed attempts. This does not mean that the problem has corrected itself. Temperature, movement, and electrical pressure can temporarily restore contact in a loose connector, damaged socket, or failing power supply.
| Intermittent Pattern | Possible Direction |
|---|---|
| Starts after the case is moved | Loose card, cable, or internal connection |
| Starts only after several attempts | Marginal power supply or board-level fault |
| Fails after sitting overnight | Cold-start electrical behavior may be involved |
| Fails after hardware is warmed | Heat-sensitive component or connection |
| Starts after power is disconnected briefly | Protection circuit or stored electrical state may be resetting |
Intermittent operation should be diagnosed before the computer is returned to regular use, especially when it contains important files or supports business activity.
Important Data May Still Be Accessible Through Another System
A failed startup does not automatically mean that the storage drive has failed. When the computer cannot remain powered, the drive may be removed and evaluated through another compatible system or enclosure.
- Identify the storage type and interface.
- Inspect the drive for visible electrical damage.
- Use a compatible connection method.
- Check for encryption or access restrictions.
- Copy important files before further repair testing when possible.
A drive should not be connected elsewhere when burned connectors, liquid damage, or severe electrical failure suggest that it could damage the test equipment.
Final Verification Should Include More Than One Successful Startup
A computer that starts once after a cable is reseated has not necessarily been repaired. The system should remain stable through several cold starts, restarts, and ordinary workloads.
- Confirm that the fans begin and continue operating as expected.
- Verify that diagnostic indicators complete their sequence.
- Check that the display appears consistently.
- Test shutdown and restart behavior.
- Observe temperatures and power stability under load.
- Reconnect removed hardware one component at a time.
The repair should also preserve correct cable routing, secure component mounting, and unobstructed airflow inside the case.
Brief Fan Movement Is a Clue, Not a Complete Diagnosis
Fans that spin briefly and stop indicate that the computer has begun responding to the power command, but the startup sequence is being interrupted or the fans are entering a controlled low-speed state. The rest of the system’s behavior determines which condition is present.
Loose processor power connections, electrical shorts, incompatible upgrades, failed power supplies, motherboard faults, damaged ports, and incorrectly installed components can all produce similar symptoms. A structured minimum-hardware test helps separate these possibilities without replacing working parts unnecessarily.
Careful inspection, compatible test components, diagnostic indicators, and repeated verification provide a more reliable answer than fan movement alone. Once the underlying fault is corrected, the computer should complete startup consistently rather than responding differently each time the power button is pressed.