The Power Button Does Not Directly Start Every Laptop Component
Pressing a laptop’s power button may feel like a simple mechanical action, but the button usually sends only a small control signal. That signal must travel through a switch, cable, connector, and motherboard logic before the computer begins its startup sequence.
If any part of that control path is interrupted, the laptop may appear completely dead even when the charger, battery, processor, memory, and storage are still functional. No fan movement, screen activity, or keyboard lighting may occur because the motherboard never receives a valid request to turn on.
This creates an important distinction between a computer that cannot produce operating power and one that was never instructed to begin producing it. Both conditions can look identical from outside the case.
Some Laptops Use a Separate Power Button Board
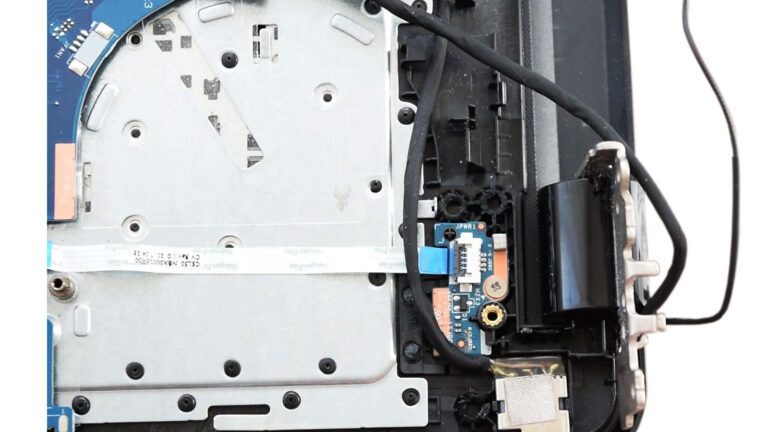
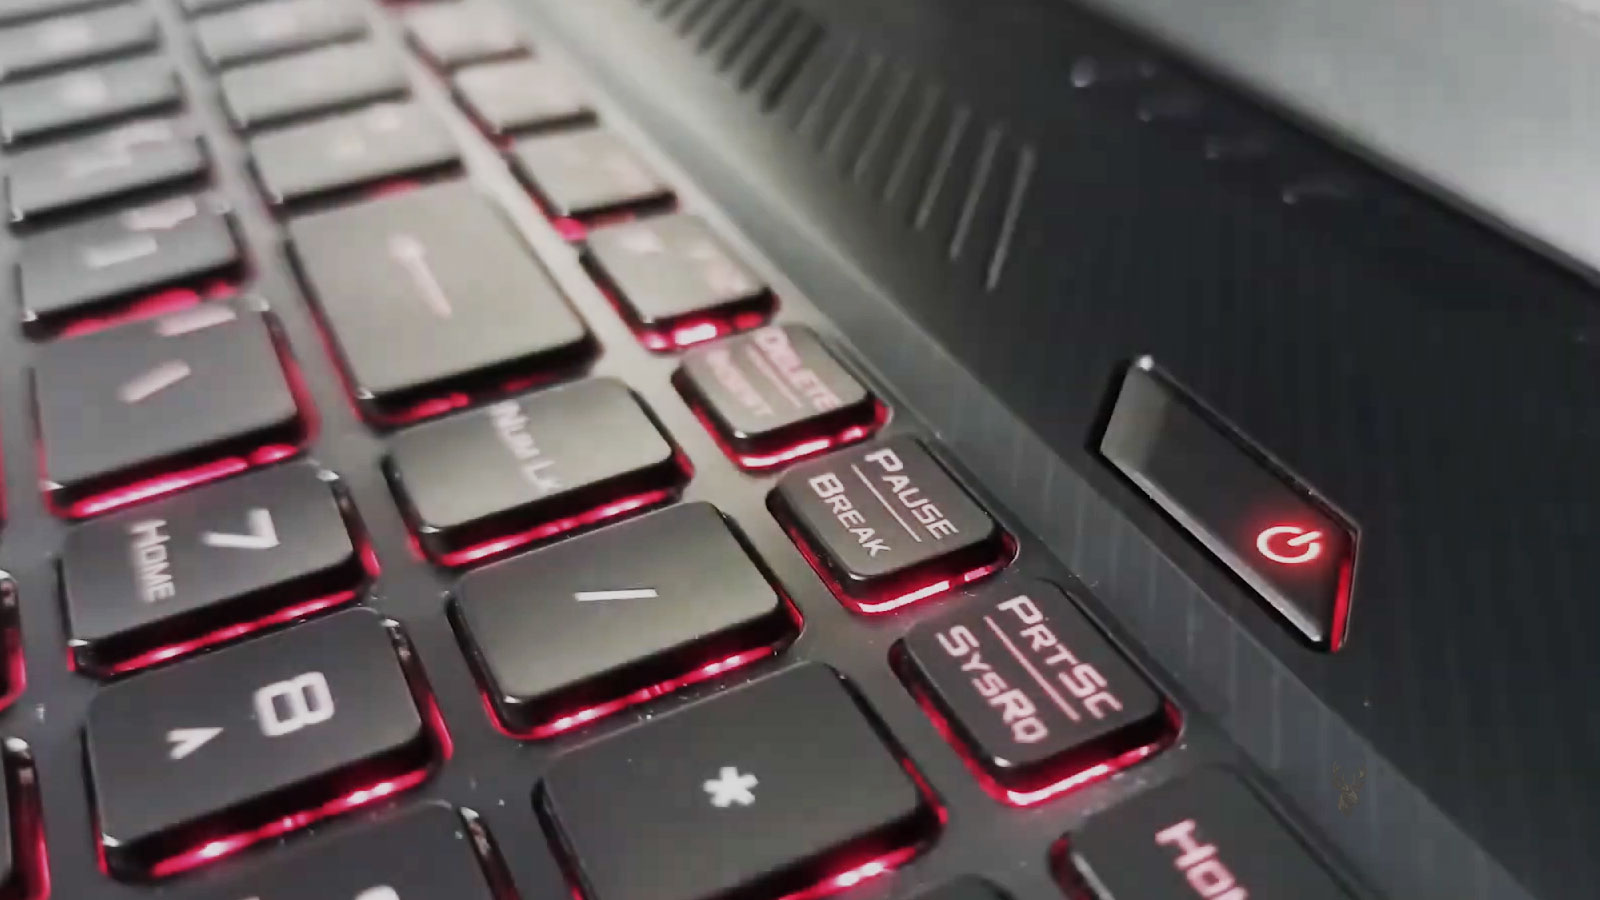
The visible power button may be mounted on a small circuit board rather than directly on the motherboard. This board can also contain indicator lights, volume controls, keyboard functions, or other switches located along the top or side of the laptop.
A thin ribbon cable commonly connects the button board to the motherboard. Damage to that cable, its locking connector, or the board itself can prevent the startup signal from reaching the control circuit.
| Part of the Button Path | Possible Failure |
|---|---|
| External button cap | Cracked plastic or incorrect alignment prevents the switch from being pressed fully. |
| Small tactile switch | Internal wear, contamination, or physical damage prevents reliable contact. |
| Power button board | Corrosion, impact damage, or a broken circuit path interrupts the signal. |
| Ribbon cable | A tear, sharp fold, or worn contact end creates an open connection. |
| Motherboard connector | A loose latch, bent contact, or damaged socket prevents communication. |
Because these parts are small and inexpensive compared with a motherboard, they should not be overlooked when a laptop shows no reaction to the power button.
The Plastic Button and the Electrical Switch Are Different Parts
The button touched by the user is often a molded piece of plastic that presses a much smaller electrical switch underneath. The outer button can become loose, shift out of position, or break away from its hinge while the actual electronic switch remains intact.
In another laptop, the plastic cap may appear normal but fail to press the switch deeply enough. The button may feel softer than before, remain partially depressed, or respond only when pressure is applied to one edge.
- The button feels loose or moves sideways.
- No distinct click can be felt beneath the button.
- The laptop starts only when the button is pressed firmly.
- Pressing near the surrounding case changes the response.
- The button remains stuck after pressure is released.
These mechanical clues do not prove that the electrical switch is good, but they help separate a broken case component from a deeper power-control failure.
A Tactile Switch Can Wear Out Without Looking Damaged
The small switch beneath the button contains internal metal contacts that close briefly when pressed. After repeated use, those contacts can wear, become contaminated, or lose the spring action that produces a consistent signal.
An unreliable switch may work during one attempt and fail during the next. Holding it longer, pressing it several times, or changing the pressure angle may temporarily produce contact, but this behavior usually becomes less dependable over time.
A switch can also remain electrically closed after the button is released. Depending on the laptop design, this may cause forced shutdowns, repeated power cycling, or behavior similar to someone continuously holding the power button.
A button that clicks normally can still contain worn or contaminated electrical contacts.
Testing the switch electrically is more reliable than judging it only by feel. The expected signal should appear when the button is pressed and disappear cleanly when it is released.
Ribbon Cable Damage Can Interrupt a Signal Too Small to Notice Visually
Power button ribbon cables are thin because they carry control signals rather than the full operating current of the laptop. Their size makes them easy to fold, crease, tear, or insert incorrectly during disassembly.
The exposed contact end may also wear after repeated removal. If the cable is not inserted evenly, one contact can remain outside the connector while the others appear properly seated.
- Inspect the cable for sharp bends, tears, or darkened contact areas.
- Confirm that the connector latch is present and closes evenly.
- Check that the cable reaches the full depth of the socket.
- Make sure the exposed contacts face the correct direction.
- Verify that nearby screws or case sections are not pinching the cable.
A ribbon cable should not be pulled out while its locking mechanism is closed. Doing so can scrape the contacts, tear the cable end, or separate the connector from the motherboard.
Standby Power Must Exist Before the Button Signal Can Be Recognized
Even when the laptop appears off, part of the motherboard normally remains active. These standby circuits monitor the power button, charger connection, battery state, lid activity, and other events that can request a change in operating condition.
If the required standby voltage is missing, a perfectly functional power button cannot start the computer. The signal has nowhere active to be received or processed.
Missing standby power can result from an input problem, failed voltage regulator, shorted component, damaged charging section, or protection circuit that has disabled the power path. This is why replacing the external button does not correct every no-response condition.
Indicator lights can provide limited clues. A charging light or battery-status light may confirm that some input circuitry is active, but it does not prove that every standby rail needed for startup is present.
The Embedded Controller Interprets the Request to Start
Many laptops use an embedded controller to manage low-level functions before the main processor begins operating. It can monitor the power switch, keyboard, battery, charger, thermal sensors, and several parts of the startup sequence.
When the power button is pressed, the controller checks whether the request is valid and whether required conditions are available. It can then coordinate additional voltage rails, reset signals, and communication with other motherboard controllers.
A problem with the embedded controller does not always mean the controller chip itself has failed. Missing firmware, damaged supporting circuits, unstable standby power, or a shorted signal line can prevent it from responding normally.
The power button begins a controlled sequence; it does not simply connect the battery directly to the motherboard.
A Stuck Power Signal Can Cause Shutdowns Instead of Startups
The same button used to start a laptop can also request sleep, shutdown, or an emergency power-off. If the switch remains closed or the signal line stays electrically active, the computer may interpret it as a continuously held button.
A laptop might begin to start and then turn off several seconds later. Another may shut down unexpectedly during normal use or refuse to remain on after the button board is connected.
- The laptop starts only after the button board is disconnected and reconnected.
- Startup begins but stops after a consistent number of seconds.
- The system powers off when the case near the button is pressed.
- The power menu appears without the button being intentionally used.
- The laptop remains stable when a suspected button assembly is disconnected.
These symptoms require careful interpretation because overheating, unstable voltage, and motherboard faults can also cause sudden shutdowns. The button signal should be tested rather than assumed to be responsible.
Case Damage Can Change How the Button Reaches the Switch
A laptop that has been dropped or opened incorrectly may develop gaps around the power button. Broken screw mounts, cracked palm-rest sections, or a shifted top cover can alter the distance between the external button and the switch beneath it.
The laptop may start while the case is partially disassembled but stop responding after the cover is installed. Tightening one screw may bend the button board, pinch its cable, or prevent the plastic actuator from moving freely.
This type of failure should be checked during reassembly rather than after every internal component has been replaced. The button must remain aligned and move normally with the case fully secured.
Missing brackets and adhesive should not be replaced with material that restricts the switch or places constant pressure on it. A temporary mechanical repair can create a permanent electrical command if the button remains partially pressed.
A Silent Laptop Requires the Startup Request and the Power System to Be Tested Separately
When nothing happens after the button is pressed, the diagnosis should determine whether the motherboard received the request. This separates button-path failures from conditions in which the request arrived but the power sequence could not continue.
A valid button signal with no startup response points deeper into standby power, controller activity, firmware, protection circuits, or the sequence that enables the main voltage rails. A missing signal keeps attention on the button, cable, connector, and related circuit path.
This distinction avoids replacing a motherboard because of a torn ribbon cable and avoids replacing a button board when the motherboard has no standby power to recognize it.
The absence of visible activity is the beginning of the diagnosis, not proof that every internal component has lost power.
External Power Conditions Should Be Verified Before the Laptop Is Opened
A power button fault can look identical to a charger problem from outside the laptop. Before the button assembly is blamed, the input source should be checked with equipment known to work correctly with that model.
The charger must provide the proper voltage, connector type, polarity, and available wattage. A plug that fits physically may still be unsuitable. Some laptops also require communication with the power adapter before they allow normal charging or full startup behavior.
- Confirm that the wall outlet is working.
- Inspect the charger cable for cuts, sharp bends, and loose sections.
- Check whether the connector fits securely in the laptop.
- Use a compatible charger with sufficient wattage.
- Observe whether any charging or status light appears.
A status light is useful, but it is not a complete diagnosis. It may show that voltage reached one portion of the board while the standby circuit needed to recognize the button remains inactive.
A Weak DC Jack Can Interrupt Power Before the Button Is Pressed
The charging connector forms the first physical connection between the adapter and many laptop power circuits. If the jack is loose, cracked, contaminated, or separated from the board, input voltage may disappear when the plug moves.
Some laptops use a jack mounted directly on the motherboard. Others place it on a cable or small input board. The repair method depends on which design is present and whether the failure is in the socket, cable, solder joints, or surrounding case structure.
| Behavior Near the Charging Port | Possible Meaning |
|---|---|
| The charging light changes when the plug moves | The jack, cable, solder connection, or adapter tip may be unstable. |
| The plug feels unusually loose | The internal contact or supporting case structure may be worn or broken. |
| The laptop works from battery but not from the charger | The input path should be checked before the power button circuit. |
| The charger light turns off when connected | A short or heavy electrical load may be present inside the laptop. |
| The laptop starts only at one plug angle | Physical movement is restoring temporary contact somewhere in the input path. |
Repeatedly twisting the plug to make the computer start can worsen the jack, damage the adapter tip, or place additional stress on the motherboard connection.
The Battery Can Hold the Power Circuit in an Abnormal State
An internal battery does more than supply energy when the charger is disconnected. It communicates with the motherboard and participates in charging, protection, and power-transition decisions.
A failed battery, damaged battery connector, or unstable communication line can interfere with startup. In some cases, the laptop responds normally after the battery is disconnected and external power is applied. In others, the computer will start from the battery but not from the charger.
This comparison helps identify which power source or control path is involved. It should be performed only when the laptop design permits safe battery disconnection and there are no signs of swelling or physical damage.
A no-response condition can be caused by the interaction between the battery and motherboard even when the power button itself is working.
A swollen battery should not be pressed back into the case or reused for testing. Physical deformation can place pressure on the keyboard, touchpad, button assembly, and internal circuit boards.
Residual Electrical States Can Prevent an Immediate Response
A laptop may occasionally remain in an abnormal low-power state after a failed wake attempt, interrupted update, unstable charger event, or abrupt loss of power. The screen stays black, the button appears ineffective, and the machine does not complete an ordinary shutdown.
Disconnecting external power and the battery, when safely accessible, can remove the remaining supply from the standby circuits. Holding the power button while the computer is fully disconnected may help discharge stored energy from some board sections.
- Disconnect the charger and all attached devices.
- Remove or disconnect the battery when the design allows it.
- Hold the power button briefly with no power sources connected.
- Reconnect one known-good power source.
- Check whether the startup response has changed.
This procedure can clear a temporary state, but it does not repair a damaged switch, failed regulator, shorted component, or broken signal line. If the condition returns, the underlying cause still needs to be identified.
A Meter Can Show Whether the Button Signal Actually Changes
The power switch can be tested more accurately by observing its electrical behavior. Depending on the design, pressing the button may pull a signal line toward ground, release it from ground, or create a brief change that the embedded controller recognizes.
The important detail is that the signal changes cleanly when the switch is pressed and returns to its resting state after release. A line that never changes suggests an open switch, damaged cable, bad connector, or interrupted board trace.
A line that remains active after release can indicate a stuck switch, contamination, shorted cable, or fault on the motherboard side of the circuit. The expected behavior varies by model, so measurements should be interpreted using the circuit design rather than a single universal voltage value.
Probing tightly spaced connectors requires care. Accidental contact between neighboring pins can create a short and damage a standby circuit that was previously functional.
Bypassing the Switch Can Confirm the Button Path but Requires Precision
On some laptop boards, a technician can briefly reproduce the power-button request at designated test points or connector contacts. If the laptop starts when the correct signal is applied directly, the button board, ribbon cable, or mechanical actuator becomes more likely to be responsible.
This is not the same as applying battery voltage to the switch connector. Power-button lines are low-voltage control signals, and connecting the wrong points can damage the embedded controller or nearby components.
A controlled bypass is a diagnostic test, not a permanent substitute for a damaged switch assembly.
If direct activation produces no response, the diagnosis moves beyond the external button path. Standby voltage, controller activity, firmware state, and power-sequencing signals must then be examined.
Indicator Lights Can Narrow the Failure to a Particular Stage
Small changes in indicator behavior can reveal whether the motherboard noticed the charger, battery, or button request. A light may turn on, change color, blink briefly, or disappear when the button is pressed.
A charging light that remains steady with no response to the button suggests that some input power is present but the startup request or later sequence may be failing. A light that turns off immediately after the button is pressed can indicate that a short or excessive current demand appears when additional rails are enabled.
- No light with a verified charger may point toward the input path or standby supply.
- A brief flash can indicate that startup begins but protection stops it.
- A repeating blink pattern may represent a manufacturer diagnostic code.
- A light that reacts to button pressure confirms that some control logic is active.
- A light that changes when the case moves can indicate a physical connection problem.
The light pattern should be recorded before parts are disconnected or settings are changed. That original behavior may be difficult to reproduce after the laptop has been opened.
A Laptop Can Begin the Sequence Without Producing a Visible Display
Sometimes the power button works and the motherboard begins startup, but the result is so limited that the computer still appears dead. The fan may twitch briefly, an indicator may flash, or a small amount of current may be drawn without any image appearing.
This is different from a missing button request. The power sequence started, but another condition prevented it from reaching normal operation. Memory problems, firmware failure, shorted voltage rails, processor power issues, and display faults can all produce little visible activity.
Listening for fan movement and drive activity, watching the keyboard lights, checking external display output, and measuring current behavior can help distinguish a silent startup attempt from a laptop that remains entirely in standby.
The presence of a startup attempt shifts the investigation away from the plastic button and toward the next stage that failed to complete.
Recently Reassembled Laptops Should Be Checked for Installation Errors
A no-response problem that begins immediately after keyboard replacement, fan cleaning, battery service, or case repair should be compared with the work that was performed. A disconnected button ribbon or improperly closed latch may be more likely than a new motherboard failure.
Small cables can be hidden beneath the keyboard or upper cover and may not be visible once the case is lowered into place. A ribbon can also slide partially out while the cover is being aligned.
- Review every connector that was opened during the repair.
- Check that ribbon cables are straight and fully inserted.
- Confirm that locking tabs were closed without cracking.
- Look for cables trapped beneath brackets or screw posts.
- Verify that the installed screws match their original locations.
A screw that is too long can damage a board, press against a cable, or distort the upper case enough to jam the button mechanism. Reassembly problems should be corrected before unrelated components are replaced.
The Next Diagnostic Step Depends on Whether the Request Reaches the Board
Once the charger, battery, button assembly, and cable path have been examined, the diagnosis should answer one central question: does the motherboard receive a proper power-button signal?
If the signal is absent, the investigation remains focused on the switch, ribbon, connector, case alignment, and circuit path leading to the controller. If the signal is present, attention moves to standby voltage, embedded-controller response, firmware, protection behavior, and the order in which the main power rails appear.
This division prevents random replacement of visible parts. It also explains why two laptops with no lights, no fan movement, and no display can require completely different repairs.
The power button is only the first request in the startup process. Part 3 will continue beyond that request and examine what must happen on the motherboard before the laptop can remain powered and begin normal hardware initialization.
The Motherboard Must Enable Power in a Controlled Order
After the embedded controller accepts the power-button request, the laptop does not activate every circuit at once. Different voltage rails are enabled in a planned sequence so that controllers, memory, processor power, and supporting devices become ready in the proper order.
Each stage may depend on confirmation from the stage before it. A regulator can report that its output is stable, a controller can release a reset signal, and another section can then begin operating. If one required condition never appears, the sequence may stop before the fan, keyboard lighting, or display becomes active.
This explains why the power button can work correctly while the laptop still appears unresponsive. The request reached the motherboard, but the board could not progress far enough to produce visible startup activity.
A Brief Fan Movement Can Mark the Point Where Startup Stopped
A fan that moves for less than a second is different from a laptop that remains completely inactive. The movement shows that at least part of the startup sequence began and that one or more switched power rails became active temporarily.
The board may then shut those rails down because a required voltage did not stabilize, a short was detected, firmware initialization failed, or a protection signal remained active. The same pattern may repeat each time the button is pressed.
- A single fan twitch may indicate that power was enabled and immediately removed.
- Repeated cycling can mean the board is attempting the same failed sequence again.
- Keyboard lights that flash once show that startup advanced beyond basic standby.
- A charger light that turns off may indicate a short or excessive input load.
- A steady fan with no display suggests that the sequence progressed farther before failing.
Small signs of activity should be recorded rather than dismissed. Their timing can help determine whether the failure occurred before or after the main rails were enabled.
Current Draw Can Reveal More Than Exterior Lights
When a compatible bench power source and proper connection method are available, current behavior can provide another view of the startup attempt. A motherboard in standby normally draws differently from one that has begun enabling processor, memory, and peripheral circuits.
A laptop that shows no change in current when the button is pressed may not be receiving the request, or the controller may not be responding to it. A brief rise followed by an immediate drop suggests that the sequence started and then stopped.
| Current Behavior | Possible Interpretation |
|---|---|
| No measurable input | The charger path, input protection, connector, or primary power circuit may be open. |
| Standby draw with no change after pressing the button | The button signal, controller response, or early sequence may be missing. |
| Brief rise followed by a return to standby | A rail may be failing, a short may be present, or protection may be stopping startup. |
| Repeated rising and falling pattern | The board may be cycling through unsuccessful startup attempts. |
| Sustained higher draw with no image | The laptop may be powered but unable to complete hardware initialization or display output. |
Current values vary widely between laptop models and operating states. The pattern and change are often more useful than comparing one reading with a universal number.
A Shorted Secondary Rail May Stay Hidden Until Startup Is Requested
Some motherboard circuits are inactive while the laptop is off. A short on one of those sections may not affect charger detection or standby lights because the damaged rail has not yet been enabled.
When the power button is pressed, the regulator attempts to create that voltage. Excessive current or a failed output can then cause the controller to shut the rail down. From outside, the laptop may show only a quick flash, fan twitch, or complete return to silence.
The shorted component may be a capacitor, controller, peripheral device, or damaged circuit section. Disconnecting removable boards and devices can help determine whether the fault is on the motherboard or attached through one of its connectors.
A normal charging light does not prove that every voltage needed after the power button is pressed is healthy.
Replacing the button board cannot correct a rail that collapses only after startup begins. The sequence must be observed far enough to identify which section fails when it is enabled.
Peripheral Devices Can Prevent the Motherboard from Completing Startup
A connected part can sometimes hold down a signal, short a voltage rail, or interfere with controller communication. The motherboard then appears defective even though the fault originates in a keyboard, USB board, storage device, wireless card, display assembly, or another attached component.
Disconnecting selected devices can simplify the system and reveal whether startup behavior changes. This should be done methodically because removing several parts at once can make the result difficult to interpret.
- Record the original response before disconnecting anything.
- Remove external USB devices, memory cards, and docking accessories.
- Disconnect one suspected internal peripheral at a time.
- Press the power button and compare the new behavior.
- Reconnect the part before moving to the next test unless the result clearly identifies it.
If the laptop begins responding after one device is removed, that device and its cable should be inspected before the motherboard is condemned. A damaged peripheral can pull down a shared circuit used by several functions.
Memory Problems Can Create a Powered Laptop with No Usable Startup
Once the motherboard reaches the stage where memory must be initialized, a poor module connection or incompatible memory configuration can stop further progress. The laptop may remain powered with a black screen, restart repeatedly, or produce a diagnostic light pattern.
This condition is not caused by the power button even though the computer appears not to start normally. The button completed its purpose, and the board advanced into hardware initialization before the failure occurred.
Reseating removable memory, testing one compatible module at a time, and inspecting the slot can help isolate this stage. Soldered memory requires different testing because the modules cannot simply be exchanged.
Memory troubleshooting should follow evidence of sustained power or diagnostic activity. It is less relevant when the laptop remains entirely in standby and the button request never reaches the controller.
Firmware Corruption Can Interrupt the Transition from Power-On to Hardware Initialization
The motherboard depends on stored firmware to initialize essential hardware and prepare the system for normal startup. If that code becomes corrupted or cannot be read correctly, the laptop may power on without reaching a usable display or may shut down shortly after the sequence begins.
Firmware trouble can follow an interrupted update, unstable power event, failed storage chip, or incorrect programming attempt. The resulting behavior varies by model. Some laptops remain on with a black screen, while others cycle, flash a status pattern, or appear to ignore ordinary recovery commands.
A firmware-related failure should not be assumed simply because no image appears. Display faults, memory problems, processor power issues, and shorted rails can create similar symptoms.
The point at which startup stops matters more than the fact that the screen remains black.
Confirming the required voltages and early control signals helps determine whether firmware is a reasonable direction or merely one possibility among several.
Power Button Behavior Can Change When the Laptop Is Assembled
A laptop may start reliably on the workbench and fail after the bottom cover, keyboard, or palm rest is installed. This does not necessarily mean the motherboard developed a new electrical failure during reassembly.
The case can press against the button board, shift a cable, flex the motherboard, or trap a connector beneath a bracket. A screw installed in the wrong location can also distort the surrounding structure or contact a circuit area.
- Test the button before the upper cover is fully secured.
- Confirm that no ribbon cable moves while the case is lowered.
- Install screws in their original positions and lengths.
- Check that the button returns freely after every press.
- Repeat startup tests after each major stage of reassembly.
Testing in stages can identify the exact point at which the response changes. Fully assembling the laptop before the first test makes mechanical interference harder to locate.
A Replacement Button Assembly Must Match the Original Circuit
Power button boards that look nearly identical may use different ribbon layouts, connector positions, indicator circuits, or switch logic. A part from a related laptop model may fit physically while failing to send the expected signal.
The board number, connector type, cable orientation, and laptop revision should be compared before installation. Reusing a damaged ribbon with a new button board can also preserve the original fault.
After replacement, the button should be tested for both startup and release behavior. The laptop must not interpret the new switch as permanently pressed, and the outer actuator should contact it without excessive force.
A successful replacement produces consistent response across repeated cold starts, restarts, sleep transitions, and ordinary case movement.
The Repair Should Correct the Failed Stage Rather Than the Most Visible Part
The power button is the visible beginning of laptop startup, but it is only one part of the complete control path. A broken actuator, worn switch, torn ribbon, missing standby rail, controller fault, shorted secondary circuit, or failed initialization stage can all produce a computer that appears not to respond normally.
A dependable diagnosis follows the signal from the user’s finger into the motherboard and then follows the power sequence beyond it. Each observation should show whether the request was created, received, accepted, and acted upon.
If the signal never leaves the button assembly, replacing or repairing that path may restore normal operation. If the signal reaches the controller but the sequence stops afterward, the repair belongs deeper in the power, firmware, or hardware initialization process.
This approach prevents a silent laptop from being reduced to a single assumption. The correct repair depends on locating the exact point where the startup request stopped producing the next expected response.